Open-source RightAI Tools Directory
  • Discover AI
  • Submit
  • Startup
  • Blog
Open-source RightAI Tools Directory
Discover the best AI tools of 2025 with the RightAI Tools Directory!

Friend Links

AI Anime GeneratorToolsApp AI

Support

Tap4
Privacy policyTerms & ConditionsContact Us
Loading...
loading...

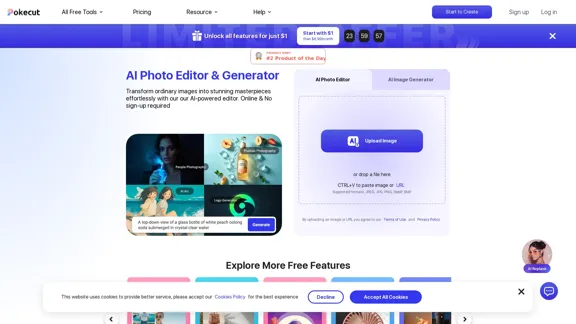
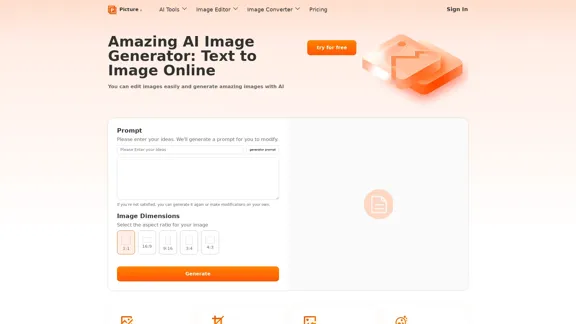
Free AI Image Generator | Prompt Generator and AI Image Creator

Picture AI is an amazing AI image generator and image editor. It generates prompts for you and then creates images that meet your needs with AI.
Visit Website
Free AI Image Generator | Prompt Generator and AI Image Creator
Visit Website

Introduction

Picture AI offers a comprehensive suite of tools for image editing and generation, making it easy for users to create, restore, and enhance images. With features like AI photo maker, background removal, and virtual try-on, it caters to both casual users and professionals. The platform is browser-based, ensuring accessibility without the need for software installation.

Feature

  1. AI Photo Maker

    Create personalized images using your own styles and photos, allowing for unique and tailored results.

  2. Photo Restoration

    Restore old or damaged photos with professional-grade services that bring cherished memories back to life.

  3. Background Removal

    Quickly and accurately remove backgrounds from images while maintaining high quality, perfect for creating clean visuals.

  4. Virtual Try-On

    Upload photos and clothing images to visualize how different outfits will look on you, enhancing the online shopping experience.

  5. Image Upscaler

    Enhance and upscale images without losing quality, making them suitable for various applications.

  6. Tattoo Generator

    Design unique tattoos in seconds using an intuitive online tool that allows for creative expression.

  7. Image Editor

    A multifunctional editor that includes cropping, resizing, filtering, and converting images across various formats.

How to Use?

  1. Visit the Picture AI website and select the desired image editing tool.
  2. Upload your image by dragging and dropping or selecting from your computer.
  3. Choose the specific function you want to use, such as background removal or photo restoration.
  4. Follow the on-screen instructions to edit your image as needed.
  5. Save or download your edited image once you are satisfied with the results.

FAQ

What is Picture AI?

Picture AI is an online platform that provides a variety of AI-powered tools for image editing, restoration, and generation, making it accessible to users of all skill levels.

How does Picture AI work?

Users can upload images and select from various editing functions, such as resizing, cropping, or applying AI features like photo restoration and background removal. The platform processes the images quickly and efficiently.

Can I use Picture AI for commercial purposes?

Yes, images edited or generated using Picture AI can be used for commercial purposes, provided you adhere to any applicable licensing agreements.

Is Picture AI free to use?

Yes, Picture AI offers free access to its tools without the need for registration or hidden fees, making it a convenient option for users.

What types of images can I edit with Picture AI?

You can edit various image formats, including JPG, PNG, WEBP, and GIF, allowing for versatile use across different projects.

Price

  • Free Plan: $0/month
  • Basic Plan: $9.99/month
  • Standard Plan: $19.99/month
  • Professional Plan: $49.99/month
The price is for reference only, please refer to the latest official data for actual information.

Evaluation

  1. Picture AI excels in providing a user-friendly interface and a wide range of tools that cater to different image editing needs, making it suitable for both casual users and professionals.

  2. The AI-powered features, such as photo restoration and background removal, are particularly impressive, delivering high-quality results in a short amount of time.

  3. However, the platform could benefit from additional advanced editing features that cater to professional photographers and graphic designers who may require more complex tools.

  4. Overall, Picture AI is a valuable resource for anyone looking to enhance their images easily, though it may not fully meet the needs of advanced users seeking comprehensive editing capabilities.

Latest Traffic Insights

  • Monthly Visits

    0

  • Bounce Rate

    0.00%

  • Pages Per Visit

    0.00

  • Time on Site(s)

    0.00

  • Global Rank

    -

  • Country Rank

    -

Recent Visits

Traffic Sources

  • Social Media:
    0.00%
  • Paid Referrals:
    0.00%
  • Email:
    0.00%
  • Referrals:
    0.00%
  • Search Engines:
    0.00%
  • Direct:
    0.00%
More Data

Related Websites

Prospecting and Lead Generation Tool
View Detail

Prospecting and Lead Generation Tool

Prospecting and Lead Generation Tool

All-in-one Website Technologies and Prospecting Tool

290.25 M
Transform Text into Studio Ghibli Art
View Detail

Transform Text into Studio Ghibli Art

Transform Text into Studio Ghibli Art

Create stunning Studio Ghibli style artwork using AI. Our text-to-image generator brings your imagination to life with the magical aesthetic of Ghibli animation.

0
Red Panda AI | A New Future of AI Image Generation
View Detail

Red Panda AI | A New Future of AI Image Generation

Red Panda AI | A New Future of AI Image Generation

Transform your designs with our professional AI red panda image generator. Create stunning artwork with perfect text placement, vector support, and consistent style. Start creating for free.

1.90 K
Midjourney API - Automate Midjourney AI Image Generation 

This document outlines how to use the Midjourney API to automate the generation of AI images. 

What is the Midjourney API?

The Midjourney API allows developers to programmatically interact with the powerful Midjourney AI model. This means you can generate images, control various parameters, and integrate Midjourney into your own applications and workflows.

Why Use the Midjourney API?

* Automation: Automate the creation of images for various purposes, such as marketing materials, website content, or research projects.
* Customization: Fine-tune image generation by controlling parameters like aspect ratio, style, and seed values.
* Integration: Seamlessly integrate Midjourney's capabilities into your existing tools and platforms.

Getting Started

1. Sign Up for a Midjourney Account: You'll need a Midjourney account to access the API.

2. Obtain an API Key: Once you have an account, you can generate an API key from your account settings.

3. Choose a Programming Language: The Midjourney API supports various programming languages, including Python, JavaScript, and Go.

4. Install the API Client: Install the appropriate API client library for your chosen language.

5. Start Generating Images: Use the API client to send image generation requests to the Midjourney server.

Example (Python):

```python
import midjourney

Replace with your actual API key
api_key = "YOUR_API_KEY"

Create a Midjourney client
client = midjourney.Client(api_key=api_key)

Generate an image
response = client.create_image(prompt="A cat wearing a hat", num_images=1)

Print the image URL
print(response.images[0].url)
```

Documentation and Resources

For detailed information about the Midjourney API, including available endpoints, parameters, and examples, please refer to the official documentation: [https://docs.midjourney.com/](https://docs.midjourney.com/)
View Detail

Midjourney API - Automate Midjourney AI Image Generation This document outlines how to use the Midjourney API to automate the generation of AI images. What is the Midjourney API? The Midjourney API allows developers to programmatically interact with the powerful Midjourney AI model. This means you can generate images, control various parameters, and integrate Midjourney into your own applications and workflows. Why Use the Midjourney API? * Automation: Automate the creation of images for various purposes, such as marketing materials, website content, or research projects. * Customization: Fine-tune image generation by controlling parameters like aspect ratio, style, and seed values. * Integration: Seamlessly integrate Midjourney's capabilities into your existing tools and platforms. Getting Started 1. Sign Up for a Midjourney Account: You'll need a Midjourney account to access the API. 2. Obtain an API Key: Once you have an account, you can generate an API key from your account settings. 3. Choose a Programming Language: The Midjourney API supports various programming languages, including Python, JavaScript, and Go. 4. Install the API Client: Install the appropriate API client library for your chosen language. 5. Start Generating Images: Use the API client to send image generation requests to the Midjourney server. Example (Python): ```python import midjourney Replace with your actual API key api_key = "YOUR_API_KEY" Create a Midjourney client client = midjourney.Client(api_key=api_key) Generate an image response = client.create_image(prompt="A cat wearing a hat", num_images=1) Print the image URL print(response.images[0].url) ``` Documentation and Resources For detailed information about the Midjourney API, including available endpoints, parameters, and examples, please refer to the official documentation: [https://docs.midjourney.com/](https://docs.midjourney.com/)

Midjourney API - Automate Midjourney AI Image Generation This document outlines how to use the Midjourney API to automate the generation of AI images. What is the Midjourney API? The Midjourney API allows developers to programmatically interact with the powerful Midjourney AI model. This means you can generate images, control various parameters, and integrate Midjourney into your own applications and workflows. Why Use the Midjourney API? * Automation: Automate the creation of images for various purposes, such as marketing materials, website content, or research projects. * Customization: Fine-tune image generation by controlling parameters like aspect ratio, style, and seed values. * Integration: Seamlessly integrate Midjourney's capabilities into your existing tools and platforms. Getting Started 1. Sign Up for a Midjourney Account: You'll need a Midjourney account to access the API. 2. Obtain an API Key: Once you have an account, you can generate an API key from your account settings. 3. Choose a Programming Language: The Midjourney API supports various programming languages, including Python, JavaScript, and Go. 4. Install the API Client: Install the appropriate API client library for your chosen language. 5. Start Generating Images: Use the API client to send image generation requests to the Midjourney server. Example (Python): ```python import midjourney Replace with your actual API key api_key = "YOUR_API_KEY" Create a Midjourney client client = midjourney.Client(api_key=api_key) Generate an image response = client.create_image(prompt="A cat wearing a hat", num_images=1) Print the image URL print(response.images[0].url) ``` Documentation and Resources For detailed information about the Midjourney API, including available endpoints, parameters, and examples, please refer to the official documentation: [https://docs.midjourney.com/](https://docs.midjourney.com/)

Easily integrate Midjourney AI into your apps using the Midjourney API. Start creating AI images automatically today!

14.36 K
Flux.1
View Detail

Flux.1

Flux.1

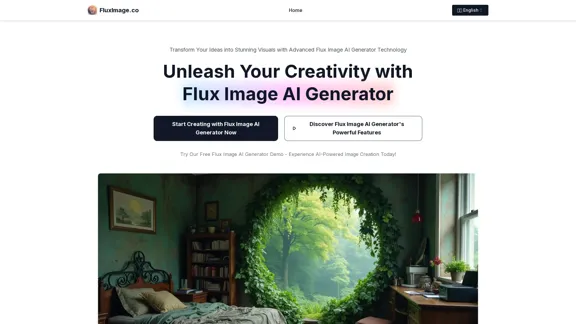
Flux1.cc - Free Flux.1 AI Image Generator

3.99 K
Batch Save ChatGPT to Notion

This is a guide on how to save multiple ChatGPT responses to Notion in a batch. 

Tools You'll Need:

* ChatGPT: An AI chatbot that can generate text.
* Notion: A note-taking and project management tool.
* Python: A programming language.
* Requests Library: A Python library for making HTTP requests.

Steps:

1. Get Your Notion API Token:
   - Go to your Notion workspace settings.
   - Navigate to the "Integrations" tab.
   - Click "Create new integration" and choose "API Token".
   - Copy your API token.

2. Install Python Libraries:
   - Open your terminal or command prompt.
   - Type `pip install requests` and press Enter.

3. Write Python Script:
   - Create a new Python file (e.g., `save_chatgpt_to_notion.py`).
   - Paste the following code into the file, replacing `YOUR_NOTION_API_TOKEN` with your actual token:

```python
import requests

def save_chatgpt_response_to_notion(response, page_id, token):
  """Saves a ChatGPT response to a Notion page."""
  url = f"https://api.notion.com/v1/pages/{page_id}/children"
  headers = {"Authorization": f"Bearer {token}"}
  data = {
    "parent": {
      "page_id": page_id
    },
    "properties": {
      "title": {
        "title": [
          {
            "text": {
              "content": "ChatGPT Response"
            }
          }
        ]
      },
      "content": {
        "rich_text": [
          {
            "text": {
              "content": response
            }
          }
        ]
      }
    }
  }
  response = requests.post(url, headers=headers, json=data)
  print(response.status_code)

Example usage
page_id = "YOUR_NOTION_PAGE_ID"
token = "YOUR_NOTION_API_TOKEN"

Get ChatGPT responses (replace with your actual ChatGPT interaction)
chatgpt_responses = [
  "This is the first ChatGPT response.",
  "This is the second ChatGPT response.",
  "This is the third ChatGPT response."
]

Save each response to Notion
for response in chatgpt_responses:
  save_chatgpt_response_to_notion(response, page_id, token)
```

4. Run the Script:
   - In your terminal, navigate to the directory where you saved the Python file.
   - Type `python save_chatgpt_to_notion.py` and press Enter.

5. Check Notion:
   - Open your Notion workspace and go to the page specified by `page_id`.
   - You should see your ChatGPT responses saved as separate blocks.
View Detail

Batch Save ChatGPT to Notion This is a guide on how to save multiple ChatGPT responses to Notion in a batch. Tools You'll Need: * ChatGPT: An AI chatbot that can generate text. * Notion: A note-taking and project management tool. * Python: A programming language. * Requests Library: A Python library for making HTTP requests. Steps: 1. Get Your Notion API Token: - Go to your Notion workspace settings. - Navigate to the "Integrations" tab. - Click "Create new integration" and choose "API Token". - Copy your API token. 2. Install Python Libraries: - Open your terminal or command prompt. - Type `pip install requests` and press Enter. 3. Write Python Script: - Create a new Python file (e.g., `save_chatgpt_to_notion.py`). - Paste the following code into the file, replacing `YOUR_NOTION_API_TOKEN` with your actual token: ```python import requests def save_chatgpt_response_to_notion(response, page_id, token): """Saves a ChatGPT response to a Notion page.""" url = f"https://api.notion.com/v1/pages/{page_id}/children" headers = {"Authorization": f"Bearer {token}"} data = { "parent": { "page_id": page_id }, "properties": { "title": { "title": [ { "text": { "content": "ChatGPT Response" } } ] }, "content": { "rich_text": [ { "text": { "content": response } } ] } } } response = requests.post(url, headers=headers, json=data) print(response.status_code) Example usage page_id = "YOUR_NOTION_PAGE_ID" token = "YOUR_NOTION_API_TOKEN" Get ChatGPT responses (replace with your actual ChatGPT interaction) chatgpt_responses = [ "This is the first ChatGPT response.", "This is the second ChatGPT response.", "This is the third ChatGPT response." ] Save each response to Notion for response in chatgpt_responses: save_chatgpt_response_to_notion(response, page_id, token) ``` 4. Run the Script: - In your terminal, navigate to the directory where you saved the Python file. - Type `python save_chatgpt_to_notion.py` and press Enter. 5. Check Notion: - Open your Notion workspace and go to the page specified by `page_id`. - You should see your ChatGPT responses saved as separate blocks.

Batch Save ChatGPT to Notion This is a guide on how to save multiple ChatGPT responses to Notion in a batch. Tools You'll Need: * ChatGPT: An AI chatbot that can generate text. * Notion: A note-taking and project management tool. * Python: A programming language. * Requests Library: A Python library for making HTTP requests. Steps: 1. Get Your Notion API Token: - Go to your Notion workspace settings. - Navigate to the "Integrations" tab. - Click "Create new integration" and choose "API Token". - Copy your API token. 2. Install Python Libraries: - Open your terminal or command prompt. - Type `pip install requests` and press Enter. 3. Write Python Script: - Create a new Python file (e.g., `save_chatgpt_to_notion.py`). - Paste the following code into the file, replacing `YOUR_NOTION_API_TOKEN` with your actual token: ```python import requests def save_chatgpt_response_to_notion(response, page_id, token): """Saves a ChatGPT response to a Notion page.""" url = f"https://api.notion.com/v1/pages/{page_id}/children" headers = {"Authorization": f"Bearer {token}"} data = { "parent": { "page_id": page_id }, "properties": { "title": { "title": [ { "text": { "content": "ChatGPT Response" } } ] }, "content": { "rich_text": [ { "text": { "content": response } } ] } } } response = requests.post(url, headers=headers, json=data) print(response.status_code) Example usage page_id = "YOUR_NOTION_PAGE_ID" token = "YOUR_NOTION_API_TOKEN" Get ChatGPT responses (replace with your actual ChatGPT interaction) chatgpt_responses = [ "This is the first ChatGPT response.", "This is the second ChatGPT response.", "This is the third ChatGPT response." ] Save each response to Notion for response in chatgpt_responses: save_chatgpt_response_to_notion(response, page_id, token) ``` 4. Run the Script: - In your terminal, navigate to the directory where you saved the Python file. - Type `python save_chatgpt_to_notion.py` and press Enter. 5. Check Notion: - Open your Notion workspace and go to the page specified by `page_id`. - You should see your ChatGPT responses saved as separate blocks.

Save ChatGPT Conversations to Notion with One Click Export your ChatGPT conversations directly to Notion with a single click.

290.25 M
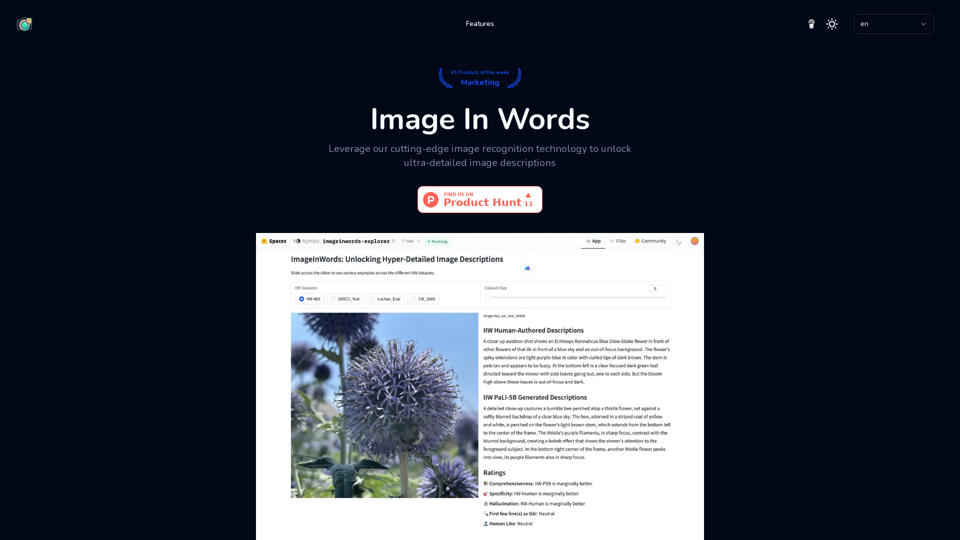
Image Describer - Free AI Image Description Tool, Allowing Every Image to Communicate
View Detail

Image Describer - Free AI Image Description Tool, Allowing Every Image to Communicate

Image Describer - Free AI Image Description Tool, Allowing Every Image to Communicate

Image Descriptor is a free AI tool that identifies and describes the contents of images. Generate accurate, detailed image descriptions effortlessly.

2.15 K
Please provide me with the poster content you want me to translate. 

For example, you can give me:

* Text from the poster: Copy and paste the text directly.
* A picture of the poster: I can try to extract the text from the image.
* A description of the poster: Tell me what the poster says and what it looks like. 


Once I have the poster content, I can translate it into English for you.
View Detail

Please provide me with the poster content you want me to translate. For example, you can give me: * Text from the poster: Copy and paste the text directly. * A picture of the poster: I can try to extract the text from the image. * A description of the poster: Tell me what the poster says and what it looks like. Once I have the poster content, I can translate it into English for you.

Please provide me with the poster content you want me to translate. For example, you can give me: * Text from the poster: Copy and paste the text directly. * A picture of the poster: I can try to extract the text from the image. * A description of the poster: Tell me what the poster says and what it looks like. Once I have the poster content, I can translate it into English for you.

An AI tool to turn an image into your own poster.

290.25 M