Open-source RightAI Tools Directory
  • Discover AI
  • Submit
  • Startup
  • Blog
Open-source RightAI Tools Directory
Discover the best AI tools of 2025 with the RightAI Tools Directory!

Friend Links

AI Anime GeneratorToolsApp AI

Support

Tap4
Privacy policyTerms & ConditionsContact Us
Loading...
loading...

Distribution

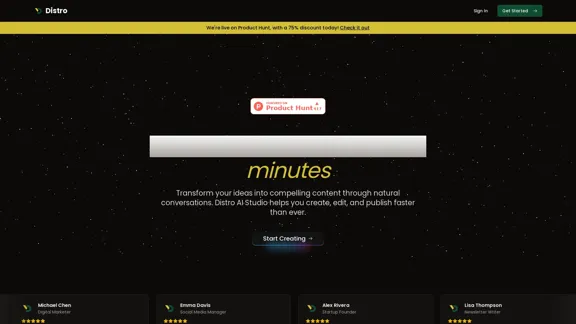
Become a content creator in seconds
Visit Website
Distribution
Visit Website

Introduction

Distro is an innovative AI-powered platform designed to transform ideas into compelling content through natural conversations. It enables users to create, edit, and publish content faster than ever, making it an essential tool for content creators, marketers, and professionals. With features that enhance collaboration and streamline the content creation process, Distro aims to empower users to maintain a consistent content presence effortlessly.

Feature

  1. AI Studio

    Engage with the Distro Agent to capture insights through friendly conversations, making content creation feel natural and intuitive.

  2. Research Competitor Strategies

    Analyze market trends and competitor strategies to stay ahead in your niche.

  3. Content Repurposing

    Effortlessly rewrite and reimagine existing content for different platforms, maximizing its reach and effectiveness.

  4. Idea Agent

    Get creative ideas on the fly, helping you brainstorm series ideas and discover niche opportunities.

  5. Content Calendar

    Organize your content strategy with a built-in content calendar to plan and schedule posts effectively.

  6. Social Media Integration

    Connect your social media profiles and post directly from Distro, simplifying the distribution process.

How to Use?

  1. Sign in to your Distro account or create a new one to get started.
  2. Utilize the AI Studio feature to engage in conversations that will help you generate content ideas.
  3. Take advantage of the Idea Agent to brainstorm and gather inspiration for your content.
  4. Use the content repurposing feature to adapt your existing materials for various platforms.
  5. Regularly analyze competitor strategies to refine your content approach and stay relevant in your field.

FAQ

What is Distro?

Distro is an AI-driven content creation platform that helps users transform their ideas into high-quality content through natural conversations.

How does Distro work?

Distro utilizes advanced AI technology to facilitate conversations that capture user insights, allowing for quick and efficient content generation.

Can I repurpose my existing content with Distro?

Yes, Distro offers features that allow you to rewrite and adapt your existing content for different platforms seamlessly.

Who can benefit from using Distro?

Content creators, digital marketers, social media managers, and anyone looking to streamline their content creation process can benefit from Distro.

What makes Distro different from other content creation tools?

Distro stands out due to its natural conversation flow, context understanding, and ability to generate high-quality content quickly.

Price

PlanMonthly CostFeatures
Free$010 Distro AI posts, 2 studio sessions
Creator$9.99250 Distro AI posts, 30 studio sessions
Standard$19.991,000 Distro AI posts, 80 studio sessions
Expert$49.991,000 Distro AI posts, 600 editor conversations
The price is for reference only, please refer to the latest official data for actual information.

Evaluation

Distro effectively streamlines the content creation process, making it accessible for users of all levels. Its conversation-to-content feature is particularly beneficial for those who may struggle with traditional writing methods. The platform's ability to integrate social media and repurpose content adds significant value.

However, there are areas for improvement. The pricing structure may be a barrier for some users, particularly those just starting out. Additionally, while the AI is capable, it may require further refinement to enhance its contextual understanding and output quality. Overall, Distro is a powerful tool for content creators, but ongoing enhancements could elevate its effectiveness even further.

Related Websites

The Song Says - Song Lyrics and Meanings
View Detail

The Song Says - Song Lyrics and Meanings

The Song Says - Song Lyrics and Meanings

Discover the meaning and stories behind song lyrics. The song says that each verse has a story to tell.

17.56 K
Get ChatGPT for Free with Google

You can now access ChatGPT, a powerful language model, for free with Google. Here's how:

Method 1: Google Colab

* Open Google Colab ([colab.research.google.com](http://colab.research.google.com))
* Create a new notebook
* Install the `transformers` library by running `!pip install transformers`
* Import the `transformers` library and load the ChatGPT model using `from transformers import AutoModelForCausalLM, AutoTokenizer; model = AutoModelForCausalLM.from_pretrained('chatgpt'); tokenizer = AutoTokenizer.from_pretrained('chatgpt')`
* Use the model to generate text using `input_text = "Your input here"; inputs = tokenizer.encode_plus(input_text, return_tensors='pt', max_length=1024, padding='max_length', truncation=True); output = model(inputs['input_ids'], attention_mask=inputs['attention_mask']); print(tokenizer.decode(output.logits[0], skip_special_tokens=True))`

Method 2: Google Apps Script

* Open Google Apps Script ([script.google.com](http://script.google.com))
* Create a new project
* Install the `transformers` library by running `npm install transformers`
* Import the `transformers` library and load the ChatGPT model using `const { AutoModelForCausalLM, AutoTokenizer } = require('transformers'); const model = new AutoModelForCausalLM('chatgpt'); const tokenizer = new AutoTokenizer('chatgpt');`
* Use the model to generate text using `const inputText = "Your input here"; const inputs = tokenizer.encodePlus(inputText, { return_tensors: 'pt', max_length: 1024, padding: 'max_length', truncation: true }); const output = model(inputs.inputIds, inputs.attentionMask); console.log(tokenizer.decode(output.logits[0], { skipSpecialTokens: true }));`

Note: These methods require some technical knowledge and may have limitations compared to the original ChatGPT model.
View Detail

Get ChatGPT for Free with Google You can now access ChatGPT, a powerful language model, for free with Google. Here's how: Method 1: Google Colab * Open Google Colab ([colab.research.google.com](http://colab.research.google.com)) * Create a new notebook * Install the `transformers` library by running `!pip install transformers` * Import the `transformers` library and load the ChatGPT model using `from transformers import AutoModelForCausalLM, AutoTokenizer; model = AutoModelForCausalLM.from_pretrained('chatgpt'); tokenizer = AutoTokenizer.from_pretrained('chatgpt')` * Use the model to generate text using `input_text = "Your input here"; inputs = tokenizer.encode_plus(input_text, return_tensors='pt', max_length=1024, padding='max_length', truncation=True); output = model(inputs['input_ids'], attention_mask=inputs['attention_mask']); print(tokenizer.decode(output.logits[0], skip_special_tokens=True))` Method 2: Google Apps Script * Open Google Apps Script ([script.google.com](http://script.google.com)) * Create a new project * Install the `transformers` library by running `npm install transformers` * Import the `transformers` library and load the ChatGPT model using `const { AutoModelForCausalLM, AutoTokenizer } = require('transformers'); const model = new AutoModelForCausalLM('chatgpt'); const tokenizer = new AutoTokenizer('chatgpt');` * Use the model to generate text using `const inputText = "Your input here"; const inputs = tokenizer.encodePlus(inputText, { return_tensors: 'pt', max_length: 1024, padding: 'max_length', truncation: true }); const output = model(inputs.inputIds, inputs.attentionMask); console.log(tokenizer.decode(output.logits[0], { skipSpecialTokens: true }));` Note: These methods require some technical knowledge and may have limitations compared to the original ChatGPT model.

Get ChatGPT for Free with Google You can now access ChatGPT, a powerful language model, for free with Google. Here's how: Method 1: Google Colab * Open Google Colab ([colab.research.google.com](http://colab.research.google.com)) * Create a new notebook * Install the `transformers` library by running `!pip install transformers` * Import the `transformers` library and load the ChatGPT model using `from transformers import AutoModelForCausalLM, AutoTokenizer; model = AutoModelForCausalLM.from_pretrained('chatgpt'); tokenizer = AutoTokenizer.from_pretrained('chatgpt')` * Use the model to generate text using `input_text = "Your input here"; inputs = tokenizer.encode_plus(input_text, return_tensors='pt', max_length=1024, padding='max_length', truncation=True); output = model(inputs['input_ids'], attention_mask=inputs['attention_mask']); print(tokenizer.decode(output.logits[0], skip_special_tokens=True))` Method 2: Google Apps Script * Open Google Apps Script ([script.google.com](http://script.google.com)) * Create a new project * Install the `transformers` library by running `npm install transformers` * Import the `transformers` library and load the ChatGPT model using `const { AutoModelForCausalLM, AutoTokenizer } = require('transformers'); const model = new AutoModelForCausalLM('chatgpt'); const tokenizer = new AutoTokenizer('chatgpt');` * Use the model to generate text using `const inputText = "Your input here"; const inputs = tokenizer.encodePlus(inputText, { return_tensors: 'pt', max_length: 1024, padding: 'max_length', truncation: true }); const output = model(inputs.inputIds, inputs.attentionMask); console.log(tokenizer.decode(output.logits[0], { skipSpecialTokens: true }));` Note: These methods require some technical knowledge and may have limitations compared to the original ChatGPT model.

How to Add ChatGPT to All Google Searches ===================================================== Step 1: Create a Custom Search Engine -------------------------------------- * Go to the [Google Custom Search Engine](https://cse.google.com/) website and sign in with your Google account. * Click on the "New Search Engine" button. * Fill in the required information, such as the name and description of your search engine. * Click on the "Create" button. Step 2: Add ChatGPT to the Search Engine ----------------------------------------- * In the "Setup" tab, click on the "Add" button next to "Sites to search". * Enter the following URL: `https://chat.openai.com/` * Click on the "Add" button. Step 3: Configure the Search Engine -------------------------------------- * In the "Setup" tab, click on the "Edit" button next to "Search engine keywords". * Add the following keywords: `ChatGPT` * Click on the "Save" button. Step 4: Get the Search Engine Code ------------------------------------- * In the "Setup" tab, click on the "Get code" button. * Copy the HTML code provided. Step 5: Add the Search Engine to Your Browser ------------------------------------------------ * Open your browser and go to the "Settings" or "Options" page. * Look for the "Search engine" or "Default search engine" option. * Click on the "Add" or "Manage search engines" button. * Paste the HTML code you copied earlier. * Click on the "Add" or "Save" button. You're Done! =============== Now, whenever you search on Google, ChatGPT will be included in the search results. You can also use the custom search engine URL provided by Google to search directly.

290.25 M
Xiaoqiu Search - Tab Page
View Detail

Xiaoqiu Search - Tab Page

Xiaoqiu Search - Tab Page

Xiaoqiu Search provides multiple types of aggregated searches, enabling more precise resource searching and saving cross-platform search time. Simultaneously, the [Xiaoqiu Search - Tab Page] mimics a mobile desktop, allowing for multi-desktop switching and setting quick menus for each website, making it a very useful browser homepage as well.

290.25 M
AI Quick Links
View Detail

AI Quick Links

AI Quick Links

Ai Quick Links is a collection of AI tools for your new tab page, which also includes a Bing search bar.

290.25 M
JustRecap
View Detail

JustRecap

JustRecap

JustRecap extracts summaries and key moments from videos so you can learn more in less time.

290.25 M
Visual Programming | Bubble

Bubble is a web development platform that allows users to build web applications without coding. It uses a visual programming language that is based on dragging and dropping elements to create the application's logic.
View Detail

Visual Programming | Bubble Bubble is a web development platform that allows users to build web applications without coding. It uses a visual programming language that is based on dragging and dropping elements to create the application's logic.

Visual Programming | Bubble Bubble is a web development platform that allows users to build web applications without coding. It uses a visual programming language that is based on dragging and dropping elements to create the application's logic.

From first-time founders to experienced engineers, Bubble allows users to build, design, and launch apps in record speed – no code required.

0
Please provide the text you want to translate into English.
View Detail

Please provide the text you want to translate into English.

Please provide the text you want to translate into English.

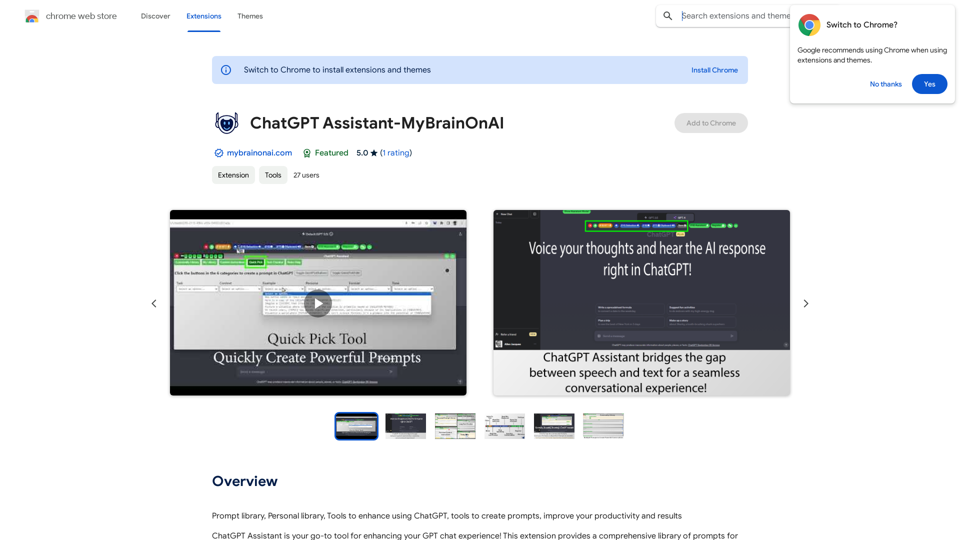
This extension empowers users with AI, swiftly producing answers, replies, and essays on any topic.

290.25 M
Mercury: Degiro Portfolio Tracking, Visualizations & AI Metrics
View Detail

Mercury: Degiro Portfolio Tracking, Visualizations & AI Metrics

Mercury: Degiro Portfolio Tracking, Visualizations & AI Metrics

Track and visualize your Degiro portfolio performance with AI, featuring an amazing dark theme and a focus on privacy.

290.25 M