Open-source RightAI Tools Directory
  • Discover AI
  • Submit
  • Startup
  • Blog
Open-source RightAI Tools Directory
Discover the best AI tools of 2025 with the RightAI Tools Directory!

Friend Links

AI Anime GeneratorToolsApp AI

Support

Tap4
Privacy policyTerms & ConditionsContact Us
Loading...
loading...

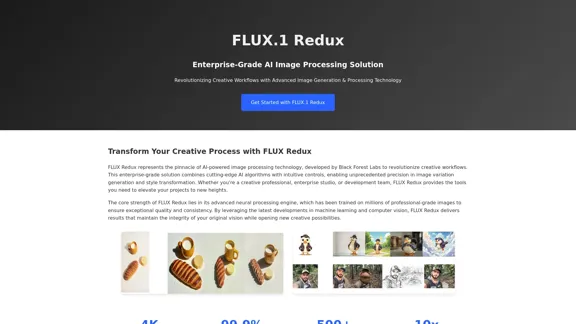
FLUX Redux - A Professional Tool for Generating AI Images

FLUX Redux is an enterprise-level AI image processing tool that provides advanced features for generating variations, restyling, and enhancing images.
Visit Website
FLUX Redux - A Professional Tool for Generating AI Images
Visit Website

Introduction

FLUX Redux is a professional AI image generation tool developed by Black Forest Labs, designed to transform creative workflows. This enterprise-grade solution utilizes advanced AI algorithms to provide precise image variation generation and style transformation, catering to creative professionals, enterprise studios, and development teams. With a focus on quality and consistency, FLUX Redux enhances the creative process while maintaining the integrity of the original vision.

Feature

  1. Advanced Neural Processing Engine

    FLUX Redux employs a sophisticated neural processing engine trained on millions of professional-grade images, ensuring exceptional quality and consistency in image outputs.

  2. 4K Output Resolution

    The tool supports high-resolution outputs, providing images in 4K quality while preserving the original characteristics.

  3. 99.9% Accuracy Rate

    With a remarkable accuracy rate, FLUX Redux guarantees that the generated images closely match user specifications.

  4. 500+ Style Presets

    Users can choose from over 500 style presets, allowing for extensive customization and creative expression.

  5. 10x Faster Processing

    The processing capabilities of FLUX Redux are significantly faster, enabling real-time feedback and immediate results.

  6. Enterprise Integration

    FLUX Redux seamlessly integrates with existing workflows through a comprehensive API, compatible with major creative software suites.

  7. Professional Output Control

    The tool offers advanced controls for precise image manipulation, ensuring consistent and high-quality results.

How to Use?

  1. Familiarize yourself with the FLUX Redux interface to maximize its capabilities.
  2. Explore the various style presets to find the best fit for your project.
  3. Utilize the API documentation for seamless integration into your existing workflows.
  4. Take advantage of batch processing features for large projects to save time.
  5. Regularly check for updates to access new features and improvements.

FAQ

What is FLUX Redux?

FLUX Redux is an AI-powered image generation tool designed for creative professionals and enterprises, offering advanced image processing capabilities.

How does FLUX Redux work?

FLUX Redux utilizes advanced AI algorithms and a neural processing engine to generate high-quality image variations and transformations based on user inputs.

Can FLUX Redux be integrated into existing workflows?

Yes, FLUX Redux offers a comprehensive API that allows for seamless integration with existing creative software and workflows.

What types of projects can benefit from FLUX Redux?

FLUX Redux is suitable for a wide range of projects, including graphic design, marketing materials, and any creative work requiring high-quality image processing.

What licensing options are available for FLUX Redux?

FLUX Redux offers flexible licensing options, including a developer plan for small teams and a professional plan for enterprise-grade solutions.

Price

  • FLUX Redux [dev]: Ideal for developers and small teams, includes full API access and basic support.

  • FLUX Redux [pro]: Enterprise-grade solution with premium features, including 24/7 support and custom integration assistance.

The price is for reference only, please refer to the latest official data for actual information.

Evaluation

  1. FLUX Redux excels in delivering high-quality image outputs with impressive accuracy and speed, making it a valuable tool for creative professionals.
  2. The extensive style presets and advanced controls provide users with significant flexibility in their creative processes.
  3. However, the complexity of the tool may require a learning curve for new users, particularly those unfamiliar with AI image processing.
  4. While the integration options are robust, ongoing support and updates are crucial for maintaining user satisfaction and adapting to evolving creative needs.
  5. Overall, FLUX Redux stands out as a leading solution in AI image processing, though continuous improvements in user experience and accessibility could enhance its appeal further.

Related Websites
LivePortrait AI: Create Amazing AI Portrait Animation in Minutes
View Detail

LivePortrait AI: Create Amazing AI Portrait Animation in Minutes

LivePortrait AI: Create Amazing AI Portrait Animation in Minutes

LivePortrait AI uses advanced technology to create stunning AI portrait animation. Upload your photo and watch it come to life with realistic movements and expressions.

0
Journey ArtPrompt with Midjourney

This guide will walk you through creating stunning artwork using Midjourney, a powerful AI art generator. 

1. Accessing Midjourney

* You'll need a Discord account to use Midjourney. 
* Join the official Midjourney server: [https://discord.gg/midjourney](https://discord.gg/midjourney)

2. Understanding the Basics

* `/imagine` Command: This is the core command for generating images.
* Prompt:  A text description of the artwork you want to create. Be specific and descriptive!
* Parameters: Options that control aspects like image size, aspect ratio, and style.

3. Crafting Your Journey Prompt

Think about the story you want to tell with your artwork.  

* Setting: Where does your journey take place? (e.g., a mystical forest, a futuristic city, a desolate wasteland)
* Characters: Who is on this journey? (e.g., a lone traveler, a group of adventurers, mythical creatures)
* Mood: What feeling do you want to evoke? (e.g., adventurous, mysterious, hopeful, melancholic)
* Style: What artistic style appeals to you? (e.g., photorealistic, painterly, abstract)

4. Putting it Together

Combine these elements into a clear and concise prompt. 

Example:

`/imagine A lone traveler journeys through a mystical forest at sunset, bathed in golden light. The path ahead is shrouded in mist, hinting at unknown wonders. Style: painterly, ethereal`

5. Experiment and Refine

* Midjourney is all about experimentation! Try different prompts, parameters, and styles.
* Use the "upscale" command to enlarge your favorite images and reveal more detail.
* Don't be afraid to iterate and refine your prompts based on the results.
View Detail

Journey ArtPrompt with Midjourney This guide will walk you through creating stunning artwork using Midjourney, a powerful AI art generator. 1. Accessing Midjourney * You'll need a Discord account to use Midjourney. * Join the official Midjourney server: [https://discord.gg/midjourney](https://discord.gg/midjourney) 2. Understanding the Basics * `/imagine` Command: This is the core command for generating images. * Prompt: A text description of the artwork you want to create. Be specific and descriptive! * Parameters: Options that control aspects like image size, aspect ratio, and style. 3. Crafting Your Journey Prompt Think about the story you want to tell with your artwork. * Setting: Where does your journey take place? (e.g., a mystical forest, a futuristic city, a desolate wasteland) * Characters: Who is on this journey? (e.g., a lone traveler, a group of adventurers, mythical creatures) * Mood: What feeling do you want to evoke? (e.g., adventurous, mysterious, hopeful, melancholic) * Style: What artistic style appeals to you? (e.g., photorealistic, painterly, abstract) 4. Putting it Together Combine these elements into a clear and concise prompt. Example: `/imagine A lone traveler journeys through a mystical forest at sunset, bathed in golden light. The path ahead is shrouded in mist, hinting at unknown wonders. Style: painterly, ethereal` 5. Experiment and Refine * Midjourney is all about experimentation! Try different prompts, parameters, and styles. * Use the "upscale" command to enlarge your favorite images and reveal more detail. * Don't be afraid to iterate and refine your prompts based on the results.

Journey ArtPrompt with Midjourney This guide will walk you through creating stunning artwork using Midjourney, a powerful AI art generator. 1. Accessing Midjourney * You'll need a Discord account to use Midjourney. * Join the official Midjourney server: [https://discord.gg/midjourney](https://discord.gg/midjourney) 2. Understanding the Basics * `/imagine` Command: This is the core command for generating images. * Prompt: A text description of the artwork you want to create. Be specific and descriptive! * Parameters: Options that control aspects like image size, aspect ratio, and style. 3. Crafting Your Journey Prompt Think about the story you want to tell with your artwork. * Setting: Where does your journey take place? (e.g., a mystical forest, a futuristic city, a desolate wasteland) * Characters: Who is on this journey? (e.g., a lone traveler, a group of adventurers, mythical creatures) * Mood: What feeling do you want to evoke? (e.g., adventurous, mysterious, hopeful, melancholic) * Style: What artistic style appeals to you? (e.g., photorealistic, painterly, abstract) 4. Putting it Together Combine these elements into a clear and concise prompt. Example: `/imagine A lone traveler journeys through a mystical forest at sunset, bathed in golden light. The path ahead is shrouded in mist, hinting at unknown wonders. Style: painterly, ethereal` 5. Experiment and Refine * Midjourney is all about experimentation! Try different prompts, parameters, and styles. * Use the "upscale" command to enlarge your favorite images and reveal more detail. * Don't be afraid to iterate and refine your prompts based on the results.

New backgrounds with Midjourney on new tabs

193.90 M
Visual Search
View Detail

Visual Search

Visual Search

This extension connects Flickr Explore with EyeRecognize's image search feature.

193.90 M
Musick.ai: Free AI Music Generator & AI Song Maker Online
View Detail

Musick.ai: Free AI Music Generator & AI Song Maker Online

Musick.ai: Free AI Music Generator & AI Song Maker Online

Explore Musick.ai as an innovative AI Music Generator, including music theory and music plaza. Create songs with AI and make AI music now!

57.04 K
AI-Mask - In-browser inference
View Detail

AI-Mask - In-browser inference

AI-Mask - In-browser inference

Bring local inference to web apps!

193.90 M
Doodles generated by GPTConsole's AI Agent DOODLE
View Detail

Doodles generated by GPTConsole's AI Agent DOODLE

Doodles generated by GPTConsole's AI Agent DOODLE

Explore a collection of unique, AI-generated doodles. Doodle Agent provides insights into the world of creative doodles. See the future of digital art now!

0
Socratic Lab
View Detail

Socratic Lab

Socratic Lab

Socratic Lab is your AI-powered community for learning and sharing knowledge. Ask anything you're curious about, connect with like-minded individuals, and join in-depth discussions.

2.71 K
Batch Save ChatGPT to Notion

This is a guide on how to save multiple ChatGPT responses to Notion in a batch. 

Tools You'll Need:

* ChatGPT: An AI chatbot that can generate text.
* Notion: A note-taking and project management tool.
* Python: A programming language.
* Requests Library: A Python library for making HTTP requests.

Steps:

1. Get Your Notion API Token:
   - Go to your Notion workspace settings.
   - Navigate to the "Integrations" tab.
   - Click "Create new integration" and choose "API Token".
   - Copy your API token.

2. Install Python Libraries:
   - Open your terminal or command prompt.
   - Type `pip install requests` and press Enter.

3. Write Python Script:
   - Create a new Python file (e.g., `save_chatgpt_to_notion.py`).
   - Paste the following code into the file, replacing `YOUR_NOTION_API_TOKEN` with your actual token:

```python
import requests

def save_chatgpt_response_to_notion(response, page_id, token):
  """Saves a ChatGPT response to a Notion page."""
  url = f"https://api.notion.com/v1/pages/{page_id}/children"
  headers = {"Authorization": f"Bearer {token}"}
  data = {
    "parent": {
      "page_id": page_id
    },
    "properties": {
      "title": {
        "title": [
          {
            "text": {
              "content": "ChatGPT Response"
            }
          }
        ]
      },
      "content": {
        "rich_text": [
          {
            "text": {
              "content": response
            }
          }
        ]
      }
    }
  }
  response = requests.post(url, headers=headers, json=data)
  print(response.status_code)

Example usage
page_id = "YOUR_NOTION_PAGE_ID"
token = "YOUR_NOTION_API_TOKEN"

Get ChatGPT responses (replace with your actual ChatGPT interaction)
chatgpt_responses = [
  "This is the first ChatGPT response.",
  "This is the second ChatGPT response.",
  "This is the third ChatGPT response."
]

Save each response to Notion
for response in chatgpt_responses:
  save_chatgpt_response_to_notion(response, page_id, token)
```

4. Run the Script:
   - In your terminal, navigate to the directory where you saved the Python file.
   - Type `python save_chatgpt_to_notion.py` and press Enter.

5. Check Notion:
   - Open your Notion workspace and go to the page specified by `page_id`.
   - You should see your ChatGPT responses saved as separate blocks.
View Detail

Batch Save ChatGPT to Notion This is a guide on how to save multiple ChatGPT responses to Notion in a batch. Tools You'll Need: * ChatGPT: An AI chatbot that can generate text. * Notion: A note-taking and project management tool. * Python: A programming language. * Requests Library: A Python library for making HTTP requests. Steps: 1. Get Your Notion API Token: - Go to your Notion workspace settings. - Navigate to the "Integrations" tab. - Click "Create new integration" and choose "API Token". - Copy your API token. 2. Install Python Libraries: - Open your terminal or command prompt. - Type `pip install requests` and press Enter. 3. Write Python Script: - Create a new Python file (e.g., `save_chatgpt_to_notion.py`). - Paste the following code into the file, replacing `YOUR_NOTION_API_TOKEN` with your actual token: ```python import requests def save_chatgpt_response_to_notion(response, page_id, token): """Saves a ChatGPT response to a Notion page.""" url = f"https://api.notion.com/v1/pages/{page_id}/children" headers = {"Authorization": f"Bearer {token}"} data = { "parent": { "page_id": page_id }, "properties": { "title": { "title": [ { "text": { "content": "ChatGPT Response" } } ] }, "content": { "rich_text": [ { "text": { "content": response } } ] } } } response = requests.post(url, headers=headers, json=data) print(response.status_code) Example usage page_id = "YOUR_NOTION_PAGE_ID" token = "YOUR_NOTION_API_TOKEN" Get ChatGPT responses (replace with your actual ChatGPT interaction) chatgpt_responses = [ "This is the first ChatGPT response.", "This is the second ChatGPT response.", "This is the third ChatGPT response." ] Save each response to Notion for response in chatgpt_responses: save_chatgpt_response_to_notion(response, page_id, token) ``` 4. Run the Script: - In your terminal, navigate to the directory where you saved the Python file. - Type `python save_chatgpt_to_notion.py` and press Enter. 5. Check Notion: - Open your Notion workspace and go to the page specified by `page_id`. - You should see your ChatGPT responses saved as separate blocks.

Batch Save ChatGPT to Notion This is a guide on how to save multiple ChatGPT responses to Notion in a batch. Tools You'll Need: * ChatGPT: An AI chatbot that can generate text. * Notion: A note-taking and project management tool. * Python: A programming language. * Requests Library: A Python library for making HTTP requests. Steps: 1. Get Your Notion API Token: - Go to your Notion workspace settings. - Navigate to the "Integrations" tab. - Click "Create new integration" and choose "API Token". - Copy your API token. 2. Install Python Libraries: - Open your terminal or command prompt. - Type `pip install requests` and press Enter. 3. Write Python Script: - Create a new Python file (e.g., `save_chatgpt_to_notion.py`). - Paste the following code into the file, replacing `YOUR_NOTION_API_TOKEN` with your actual token: ```python import requests def save_chatgpt_response_to_notion(response, page_id, token): """Saves a ChatGPT response to a Notion page.""" url = f"https://api.notion.com/v1/pages/{page_id}/children" headers = {"Authorization": f"Bearer {token}"} data = { "parent": { "page_id": page_id }, "properties": { "title": { "title": [ { "text": { "content": "ChatGPT Response" } } ] }, "content": { "rich_text": [ { "text": { "content": response } } ] } } } response = requests.post(url, headers=headers, json=data) print(response.status_code) Example usage page_id = "YOUR_NOTION_PAGE_ID" token = "YOUR_NOTION_API_TOKEN" Get ChatGPT responses (replace with your actual ChatGPT interaction) chatgpt_responses = [ "This is the first ChatGPT response.", "This is the second ChatGPT response.", "This is the third ChatGPT response." ] Save each response to Notion for response in chatgpt_responses: save_chatgpt_response_to_notion(response, page_id, token) ``` 4. Run the Script: - In your terminal, navigate to the directory where you saved the Python file. - Type `python save_chatgpt_to_notion.py` and press Enter. 5. Check Notion: - Open your Notion workspace and go to the page specified by `page_id`. - You should see your ChatGPT responses saved as separate blocks.

Save ChatGPT Conversations to Notion with One Click Export your ChatGPT conversations directly to Notion with a single click.

193.90 M