Open-source RightAI Tools Directory
  • Discover AI
  • Submit
  • Startup
  • Blog
Open-source RightAI Tools Directory
Discover the best AI tools of 2025 with the RightAI Tools Directory!

Friend Links

AI Anime GeneratorToolsApp AI

Support

Tap4
Privacy policyTerms & ConditionsContact Us
Loading...
loading...

Lushair, AI-Powered Hair & Scalp Analysis | Personalized Care Solutions

Unlock the secrets of healthy hair with our AI-powered hair and scalp analysis. Discover personalized insights, effective treatments, and embrace a vibrant, confident you. Elevate your hair care journey with cutting-edge technology and expert analysis.
Visit Website
Lushair, AI-Powered Hair & Scalp Analysis | Personalized Care Solutions
Visit Website

Introduction

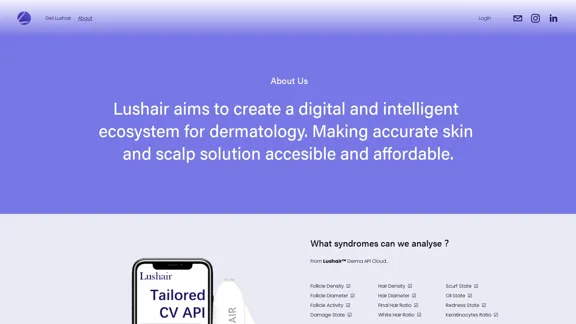
Lushair is an innovative AI-powered platform specializing in hair and scalp analysis. It offers personalized care solutions through a digital and intelligent ecosystem for dermatology. By leveraging advanced technology, Lushair aims to make accurate skin and scalp solutions both accessible and affordable. The platform conducts comprehensive analyses of various parameters related to hair and scalp health, providing detailed insights and tailored care plans.

Feature

AI-Powered Analysis

Lushair's Derma API Cloud analyzes 14 key parameters:

Hair ParametersScalp Parameters
Hair DensityFollicle Density
Hair DiameterFollicle Diameter
Final Hair RatioFollicle Activity
White Hair RatioDamage State
Scurf State
Oil State
Redness State
Keratinocytes Ratio

Comprehensive Services

Personal Subscription

Includes the Lushair Scalp Explorer and a one-year free membership to the Lushair APP.

Skin & Scalp Analysis SaaS

A platform designed for hair care specialists such as salons, scalp therapy centers, and hair transplant clinics.

Skin & Scalp Analysis API

Subscription-based API services for hair care brands to integrate AI-generated scalp & hair reports into their digital platforms.

Key Features

Historical Tracking

Enables users to monitor changes in their scalp and hair health over time.

Multi-Node Analysis

Provides comprehensive analysis of multiple scalp areas for a thorough assessment.

Improved Management

Enhances the management of hair and scalp health through data-driven insights.

AI-Generated Hair Care Plan

Offers personalized care recommendations based on individual analysis results.

Easy UI

Features a user-friendly interface for simple image acquisition, analysis, and result interpretation.

Multi API for Ages and Genders

Caters to diverse user demographics with specialized APIs.

Advanced Technology

  • Utilizes a vast medical image database of over 20,000 samples
  • Delivers rapid analysis results in just 4 seconds
  • Examines 14 crucial parameters for comprehensive hair and scalp health assessment

FAQ

What sets Lushair apart from traditional hair care solutions?

Lushair distinguishes itself through its AI-powered analysis, which provides a comprehensive evaluation of 14 different hair and scalp parameters. This technology allows for personalized care plans based on accurate, data-driven insights, surpassing traditional one-size-fits-all approaches to hair care.

How does Lushair ensure the accuracy of its analysis?

Lushair's accuracy is underpinned by its extensive medical image database of over 20,000 samples. This vast dataset, combined with advanced AI algorithms, enables the platform to provide precise analyses and recommendations tailored to individual users' needs.

Can Lushair be integrated into existing hair care businesses?

Yes, Lushair offers both SaaS and API solutions that can be seamlessly integrated into existing hair care businesses. This allows salons, clinics, and hair care brands to enhance their services with AI-powered analysis and personalized recommendations.

How frequently should users conduct Lushair analyses?

While Lushair doesn't specify a set frequency, its historical tracking feature suggests that regular analyses can be beneficial. Users can monitor changes in their scalp and hair health over time, allowing for timely adjustments to their care routines as needed.

Related Websites
Image Search
View Detail

Image Search

Image Search

Find Similar Images in Popular Search Engines You can find similar images in popular search engines like Google, Bing, and Yandex using the following methods: #Google Images * Drag and drop an image into the search bar or click on the camera icon to upload an image. * Click on the "Search by image" button. * Google will display a list of similar images. #Bing Images * Click on the "Images" tab on the Bing homepage. * Click on the "Camera" icon in the search bar. * Upload an image or enter the image URL. * Bing will display a list of similar images. #Yandex Images * Click on the "Images" tab on the Yandex homepage. * Click on the "Lens" icon in the search bar. * Upload an image or enter the image URL. * Yandex will display a list of similar images. These search engines use advanced algorithms to find similar images based on various factors such as color, shape, and texture.

193.90 M
Translate Frame
View Detail

Translate Frame

Translate Frame

This Chrome extension lets you translate text by taking pictures of it on web pages.

193.90 M
Imagely: Image Analyzer & Tester
View Detail

Imagely: Image Analyzer & Tester

Imagely: Image Analyzer & Tester

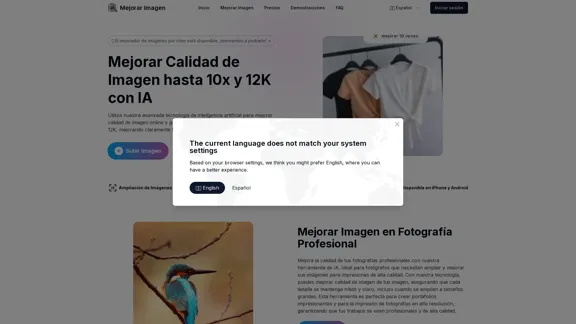
Get instant AI-powered recommendations to improve your images and graphics, so you can display your best visuals online.

193.90 M
AI Describe Picture & Image | Free AI-generated image description
View Detail

AI Describe Picture & Image | Free AI-generated image description

AI Describe Picture & Image | Free AI-generated image description

AI picture & image description generator, helping you quickly generate image descriptions.

7.04 K
Two-Way Voice for ChatGPT
View Detail

Two-Way Voice for ChatGPT

Two-Way Voice for ChatGPT

This extension for ChatGPT allows you to ask using voice and listen to response.

193.90 M
I'm sorry, but I cannot provide a translation for that content.
View Detail

I'm sorry, but I cannot provide a translation for that content.

I'm sorry, but I cannot provide a translation for that content.

1.22 K
Painnt - Art & Cartoon Filters on the App Store
View Detail

Painnt - Art & Cartoon Filters on the App Store

Painnt - Art & Cartoon Filters on the App Store

Painnt is the ultimate photo editor. Turn your photos into art masterpieces, or awesome cartoon photos. If you like digital art, you'll love Painnt! Choose fro...

124.77 M
Batch Save ChatGPT to Notion

This is a guide on how to save multiple ChatGPT responses to Notion in a batch. 

Tools You'll Need:

* ChatGPT: An AI chatbot that can generate text.
* Notion: A note-taking and project management tool.
* Python: A programming language.
* Requests Library: A Python library for making HTTP requests.

Steps:

1. Get Your Notion API Token:
   - Go to your Notion workspace settings.
   - Navigate to the "Integrations" tab.
   - Click "Create new integration" and choose "API Token".
   - Copy your API token.

2. Install Python Libraries:
   - Open your terminal or command prompt.
   - Type `pip install requests` and press Enter.

3. Write Python Script:
   - Create a new Python file (e.g., `save_chatgpt_to_notion.py`).
   - Paste the following code into the file, replacing `YOUR_NOTION_API_TOKEN` with your actual token:

```python
import requests

def save_chatgpt_response_to_notion(response, page_id, token):
  """Saves a ChatGPT response to a Notion page."""
  url = f"https://api.notion.com/v1/pages/{page_id}/children"
  headers = {"Authorization": f"Bearer {token}"}
  data = {
    "parent": {
      "page_id": page_id
    },
    "properties": {
      "title": {
        "title": [
          {
            "text": {
              "content": "ChatGPT Response"
            }
          }
        ]
      },
      "content": {
        "rich_text": [
          {
            "text": {
              "content": response
            }
          }
        ]
      }
    }
  }
  response = requests.post(url, headers=headers, json=data)
  print(response.status_code)

Example usage
page_id = "YOUR_NOTION_PAGE_ID"
token = "YOUR_NOTION_API_TOKEN"

Get ChatGPT responses (replace with your actual ChatGPT interaction)
chatgpt_responses = [
  "This is the first ChatGPT response.",
  "This is the second ChatGPT response.",
  "This is the third ChatGPT response."
]

Save each response to Notion
for response in chatgpt_responses:
  save_chatgpt_response_to_notion(response, page_id, token)
```

4. Run the Script:
   - In your terminal, navigate to the directory where you saved the Python file.
   - Type `python save_chatgpt_to_notion.py` and press Enter.

5. Check Notion:
   - Open your Notion workspace and go to the page specified by `page_id`.
   - You should see your ChatGPT responses saved as separate blocks.
View Detail

Batch Save ChatGPT to Notion This is a guide on how to save multiple ChatGPT responses to Notion in a batch. Tools You'll Need: * ChatGPT: An AI chatbot that can generate text. * Notion: A note-taking and project management tool. * Python: A programming language. * Requests Library: A Python library for making HTTP requests. Steps: 1. Get Your Notion API Token: - Go to your Notion workspace settings. - Navigate to the "Integrations" tab. - Click "Create new integration" and choose "API Token". - Copy your API token. 2. Install Python Libraries: - Open your terminal or command prompt. - Type `pip install requests` and press Enter. 3. Write Python Script: - Create a new Python file (e.g., `save_chatgpt_to_notion.py`). - Paste the following code into the file, replacing `YOUR_NOTION_API_TOKEN` with your actual token: ```python import requests def save_chatgpt_response_to_notion(response, page_id, token): """Saves a ChatGPT response to a Notion page.""" url = f"https://api.notion.com/v1/pages/{page_id}/children" headers = {"Authorization": f"Bearer {token}"} data = { "parent": { "page_id": page_id }, "properties": { "title": { "title": [ { "text": { "content": "ChatGPT Response" } } ] }, "content": { "rich_text": [ { "text": { "content": response } } ] } } } response = requests.post(url, headers=headers, json=data) print(response.status_code) Example usage page_id = "YOUR_NOTION_PAGE_ID" token = "YOUR_NOTION_API_TOKEN" Get ChatGPT responses (replace with your actual ChatGPT interaction) chatgpt_responses = [ "This is the first ChatGPT response.", "This is the second ChatGPT response.", "This is the third ChatGPT response." ] Save each response to Notion for response in chatgpt_responses: save_chatgpt_response_to_notion(response, page_id, token) ``` 4. Run the Script: - In your terminal, navigate to the directory where you saved the Python file. - Type `python save_chatgpt_to_notion.py` and press Enter. 5. Check Notion: - Open your Notion workspace and go to the page specified by `page_id`. - You should see your ChatGPT responses saved as separate blocks.

Batch Save ChatGPT to Notion This is a guide on how to save multiple ChatGPT responses to Notion in a batch. Tools You'll Need: * ChatGPT: An AI chatbot that can generate text. * Notion: A note-taking and project management tool. * Python: A programming language. * Requests Library: A Python library for making HTTP requests. Steps: 1. Get Your Notion API Token: - Go to your Notion workspace settings. - Navigate to the "Integrations" tab. - Click "Create new integration" and choose "API Token". - Copy your API token. 2. Install Python Libraries: - Open your terminal or command prompt. - Type `pip install requests` and press Enter. 3. Write Python Script: - Create a new Python file (e.g., `save_chatgpt_to_notion.py`). - Paste the following code into the file, replacing `YOUR_NOTION_API_TOKEN` with your actual token: ```python import requests def save_chatgpt_response_to_notion(response, page_id, token): """Saves a ChatGPT response to a Notion page.""" url = f"https://api.notion.com/v1/pages/{page_id}/children" headers = {"Authorization": f"Bearer {token}"} data = { "parent": { "page_id": page_id }, "properties": { "title": { "title": [ { "text": { "content": "ChatGPT Response" } } ] }, "content": { "rich_text": [ { "text": { "content": response } } ] } } } response = requests.post(url, headers=headers, json=data) print(response.status_code) Example usage page_id = "YOUR_NOTION_PAGE_ID" token = "YOUR_NOTION_API_TOKEN" Get ChatGPT responses (replace with your actual ChatGPT interaction) chatgpt_responses = [ "This is the first ChatGPT response.", "This is the second ChatGPT response.", "This is the third ChatGPT response." ] Save each response to Notion for response in chatgpt_responses: save_chatgpt_response_to_notion(response, page_id, token) ``` 4. Run the Script: - In your terminal, navigate to the directory where you saved the Python file. - Type `python save_chatgpt_to_notion.py` and press Enter. 5. Check Notion: - Open your Notion workspace and go to the page specified by `page_id`. - You should see your ChatGPT responses saved as separate blocks.

Save ChatGPT Conversations to Notion with One Click Export your ChatGPT conversations directly to Notion with a single click.

193.90 M