Open-source RightAI Tools Directory
  • Discover AI
  • Submit
  • Startup
  • Blog
Open-source RightAI Tools Directory
Discover the best AI tools of 2025 with the RightAI Tools Directory!

Friend Links

AI Anime GeneratorToolsApp AI

Support

Tap4
Privacy policyTerms & ConditionsContact Us
Loading...
loading...

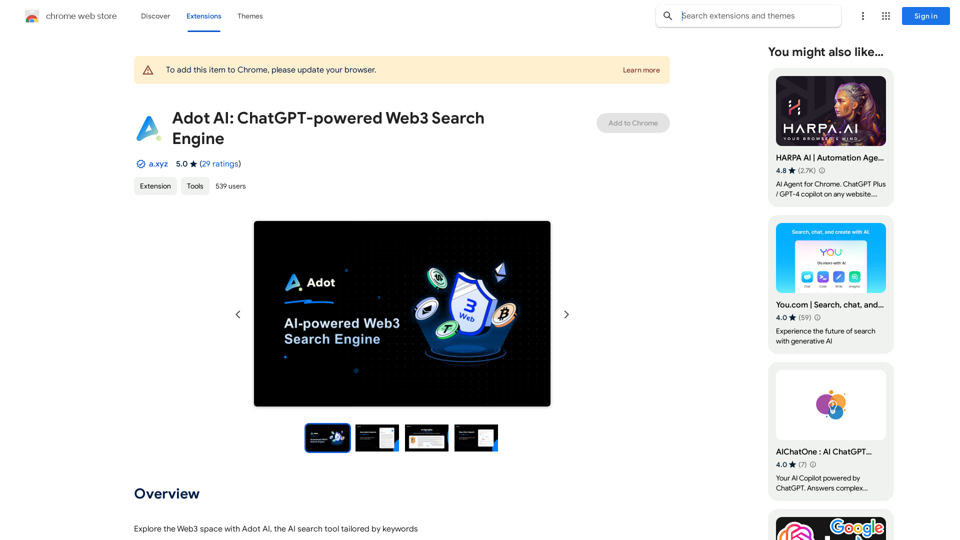
Adot AI: ChatGPT-powered Web3 Search Engine

Explore the Web3 space with Adot AI, the AI search tool tailored by keywords.
Visit Website
Adot AI: ChatGPT-powered Web3 Search Engine
Visit Website

Introduction

Adot AI is a ChatGPT-powered Web3 search engine that integrates seamlessly with Google Chrome. It enhances browsing experiences by providing smart keyword-driven insights and transforming the way users explore the Web3 space. This innovative tool adapts to user needs, making it more than just a search engine but a comprehensive Web3 explorer.

Feature

AI Search Highlights

Adot AI implements innovative AI search highlights that identify and emphasize critical Web3 terms directly on web pages. This feature simplifies blockchain navigation, allowing users to hover over highlighted terms and prompt a "Search with Adot AI" option for a single-click deep dive into Web3 concepts.

User-Defined Language Selection

The latest update introduces multi-language support, allowing users to choose their preferred language for searching and browsing. Adot AI now supports 10 languages:

Supported Languages
Simplified Chinese
Traditional Chinese
English
Russian
Hindi
Bahasa Indonesia
German
Spanish
Japanese
Korean

Real-Time Search Results

Adot AI provides precise, real-time search results tailored for various Web3 stakeholders, including cryptocurrency enthusiasts, blockchain creators, and security experts. This feature ensures users have access to the most up-to-date and relevant information in the rapidly evolving Web3 space.

FAQ

What is Adot AI?

Adot AI is a ChatGPT-powered Web3 search engine that integrates with Google Chrome, offering smart keyword-driven insights and transforming the browsing experience for Web3 exploration.

How do I use Adot AI?

To use Adot AI, simply install the Chrome extension and start exploring the Web3 space. With a single click, Adot AI provides a popup filled with rich analyses of Web3 concepts, effortlessly equipping users with vital knowledge.

Is Adot AI free to use?

Yes, Adot AI is a free extension that can be used without any subscription or payment, making it accessible to all users interested in exploring the Web3 space.

Latest Traffic Insights

  • Monthly Visits

    193.90 M

  • Bounce Rate

    56.27%

  • Pages Per Visit

    2.71

  • Time on Site(s)

    115.91

  • Global Rank

    -

  • Country Rank

    -

Recent Visits

Traffic Sources

  • Social Media:
    0.48%
  • Paid Referrals:
    0.55%
  • Email:
    0.15%
  • Referrals:
    12.81%
  • Search Engines:
    16.21%
  • Direct:
    69.81%
More Data

Related Websites

OptiMalt
View Detail

OptiMalt

OptiMalt

Turn your Malt profile into a lead-generating machine by optimizing it.

193.90 M
IntelliMark
View Detail

IntelliMark

IntelliMark

An intelligent bookmark finder! Just tell it what you're looking for in your own words, and it will find the most useful bookmarks for you!

193.90 M
Yoom Knowledge
View Detail

Yoom Knowledge

Yoom Knowledge

Using the Yoom Knowledge Chrome extension, you can automatically generate email content in Gmail or Outlook. AI will create emails for you using the company knowledge accumulated in Yoom Knowledge, allowing you to complete email responses in an instant.

193.90 M
AMISSU
View Detail

AMISSU

AMISSU

AMIS Schedule Unitizer: Automatic Schedule Planner for University Class Enrollment

193.90 M
Get ChatGPT for Free with Google

You can now access ChatGPT, a powerful language model, for free with Google. Here's how:

Method 1: Google Colab

* Open Google Colab ([colab.research.google.com](http://colab.research.google.com))
* Create a new notebook
* Install the `transformers` library by running `!pip install transformers`
* Import the `transformers` library and load the ChatGPT model using `from transformers import AutoModelForCausalLM, AutoTokenizer; model = AutoModelForCausalLM.from_pretrained('chatgpt'); tokenizer = AutoTokenizer.from_pretrained('chatgpt')`
* Use the model to generate text using `input_text = "Your input here"; inputs = tokenizer.encode_plus(input_text, return_tensors='pt', max_length=1024, padding='max_length', truncation=True); output = model(inputs['input_ids'], attention_mask=inputs['attention_mask']); print(tokenizer.decode(output.logits[0], skip_special_tokens=True))`

Method 2: Google Apps Script

* Open Google Apps Script ([script.google.com](http://script.google.com))
* Create a new project
* Install the `transformers` library by running `npm install transformers`
* Import the `transformers` library and load the ChatGPT model using `const { AutoModelForCausalLM, AutoTokenizer } = require('transformers'); const model = new AutoModelForCausalLM('chatgpt'); const tokenizer = new AutoTokenizer('chatgpt');`
* Use the model to generate text using `const inputText = "Your input here"; const inputs = tokenizer.encodePlus(inputText, { return_tensors: 'pt', max_length: 1024, padding: 'max_length', truncation: true }); const output = model(inputs.inputIds, inputs.attentionMask); console.log(tokenizer.decode(output.logits[0], { skipSpecialTokens: true }));`

Note: These methods require some technical knowledge and may have limitations compared to the original ChatGPT model.
View Detail

Get ChatGPT for Free with Google You can now access ChatGPT, a powerful language model, for free with Google. Here's how: Method 1: Google Colab * Open Google Colab ([colab.research.google.com](http://colab.research.google.com)) * Create a new notebook * Install the `transformers` library by running `!pip install transformers` * Import the `transformers` library and load the ChatGPT model using `from transformers import AutoModelForCausalLM, AutoTokenizer; model = AutoModelForCausalLM.from_pretrained('chatgpt'); tokenizer = AutoTokenizer.from_pretrained('chatgpt')` * Use the model to generate text using `input_text = "Your input here"; inputs = tokenizer.encode_plus(input_text, return_tensors='pt', max_length=1024, padding='max_length', truncation=True); output = model(inputs['input_ids'], attention_mask=inputs['attention_mask']); print(tokenizer.decode(output.logits[0], skip_special_tokens=True))` Method 2: Google Apps Script * Open Google Apps Script ([script.google.com](http://script.google.com)) * Create a new project * Install the `transformers` library by running `npm install transformers` * Import the `transformers` library and load the ChatGPT model using `const { AutoModelForCausalLM, AutoTokenizer } = require('transformers'); const model = new AutoModelForCausalLM('chatgpt'); const tokenizer = new AutoTokenizer('chatgpt');` * Use the model to generate text using `const inputText = "Your input here"; const inputs = tokenizer.encodePlus(inputText, { return_tensors: 'pt', max_length: 1024, padding: 'max_length', truncation: true }); const output = model(inputs.inputIds, inputs.attentionMask); console.log(tokenizer.decode(output.logits[0], { skipSpecialTokens: true }));` Note: These methods require some technical knowledge and may have limitations compared to the original ChatGPT model.

Get ChatGPT for Free with Google You can now access ChatGPT, a powerful language model, for free with Google. Here's how: Method 1: Google Colab * Open Google Colab ([colab.research.google.com](http://colab.research.google.com)) * Create a new notebook * Install the `transformers` library by running `!pip install transformers` * Import the `transformers` library and load the ChatGPT model using `from transformers import AutoModelForCausalLM, AutoTokenizer; model = AutoModelForCausalLM.from_pretrained('chatgpt'); tokenizer = AutoTokenizer.from_pretrained('chatgpt')` * Use the model to generate text using `input_text = "Your input here"; inputs = tokenizer.encode_plus(input_text, return_tensors='pt', max_length=1024, padding='max_length', truncation=True); output = model(inputs['input_ids'], attention_mask=inputs['attention_mask']); print(tokenizer.decode(output.logits[0], skip_special_tokens=True))` Method 2: Google Apps Script * Open Google Apps Script ([script.google.com](http://script.google.com)) * Create a new project * Install the `transformers` library by running `npm install transformers` * Import the `transformers` library and load the ChatGPT model using `const { AutoModelForCausalLM, AutoTokenizer } = require('transformers'); const model = new AutoModelForCausalLM('chatgpt'); const tokenizer = new AutoTokenizer('chatgpt');` * Use the model to generate text using `const inputText = "Your input here"; const inputs = tokenizer.encodePlus(inputText, { return_tensors: 'pt', max_length: 1024, padding: 'max_length', truncation: true }); const output = model(inputs.inputIds, inputs.attentionMask); console.log(tokenizer.decode(output.logits[0], { skipSpecialTokens: true }));` Note: These methods require some technical knowledge and may have limitations compared to the original ChatGPT model.

How to Add ChatGPT to All Google Searches ===================================================== Step 1: Create a Custom Search Engine -------------------------------------- * Go to the [Google Custom Search Engine](https://cse.google.com/) website and sign in with your Google account. * Click on the "New Search Engine" button. * Fill in the required information, such as the name and description of your search engine. * Click on the "Create" button. Step 2: Add ChatGPT to the Search Engine ----------------------------------------- * In the "Setup" tab, click on the "Add" button next to "Sites to search". * Enter the following URL: `https://chat.openai.com/` * Click on the "Add" button. Step 3: Configure the Search Engine -------------------------------------- * In the "Setup" tab, click on the "Edit" button next to "Search engine keywords". * Add the following keywords: `ChatGPT` * Click on the "Save" button. Step 4: Get the Search Engine Code ------------------------------------- * In the "Setup" tab, click on the "Get code" button. * Copy the HTML code provided. Step 5: Add the Search Engine to Your Browser ------------------------------------------------ * Open your browser and go to the "Settings" or "Options" page. * Look for the "Search engine" or "Default search engine" option. * Click on the "Add" or "Manage search engines" button. * Paste the HTML code you copied earlier. * Click on the "Add" or "Save" button. You're Done! =============== Now, whenever you search on Google, ChatGPT will be included in the search results. You can also use the custom search engine URL provided by Google to search directly.

193.90 M
Seenopsi
View Detail

Seenopsi

Seenopsi

Send custom prompts, generate content, summarize links, entire web pages, YouTube videos, and code, and much more! All powered by GPT-4 ⚡️

193.90 M
UMLGenius
View Detail

UMLGenius

UMLGenius

A Chrome extension for generating UML diagrams

193.90 M
Fast AI
View Detail

Fast AI

Fast AI

A fast and helpful tool that lets you use ChatGPT on any website.

193.90 M