Open-source RightAI Tools Directory
  • Discover AI
  • Submit
  • Startup
  • Blog
Open-source RightAI Tools Directory
Discover the best AI tools of 2025 with the RightAI Tools Directory!

Friend Links

AI Anime GeneratorToolsApp AI

Support

Tap4
Privacy policyTerms & ConditionsContact Us
Loading...
loading...

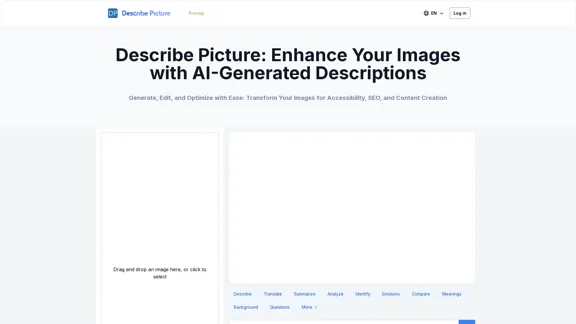
AI Image Editor

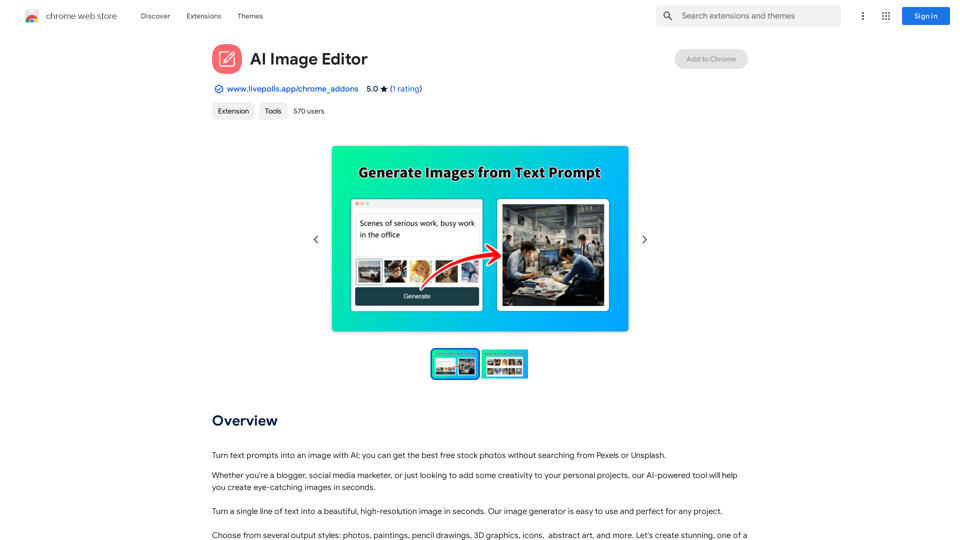
Use AI to create images from text descriptions; find high-quality free stock photos without using Pexels or Unsplash.
Visit Website
AI Image Editor
Visit Website

Introduction

AI Image Editor is a revolutionary tool that harnesses the power of artificial intelligence to transform text prompts into stunning visual content. This user-friendly platform enables anyone, regardless of design experience, to create high-quality images in seconds. It's an ideal solution for bloggers, social media marketers, and creative individuals looking to enhance their projects with unique visuals.

Feature

Text-to-Image Generation

AI Image Editor utilizes advanced AI technology to convert text descriptions into visually appealing images, allowing users to bring their ideas to life without manual design work.

Diverse Output Styles

Users can choose from a wide range of artistic styles, including:

  • Photos
  • Paintings
  • Pencil drawings
  • 3D graphics
  • Icons
  • Abstract art
  • And more

User-Friendly Interface

The platform boasts an intuitive design, making it accessible to users of all skill levels. Creating an image is as simple as entering a text prompt and clicking a button.

High-Quality Image Output

AI Image Editor produces professional-grade images suitable for various applications, from personal projects to commercial use.

Free to Use

The tool is completely free, with no subscription fees or usage limitations. Users can generate as many images as they need without any cost.

Versatile Applications

AI Image Editor caters to a wide range of needs, including:

  • Blog post illustrations
  • Social media content
  • Marketing materials
  • Personal creative projects

FAQ

How does AI Image Editor work?

AI Image Editor uses artificial intelligence to analyze text prompts and generate corresponding images. The process involves three simple steps:

  1. Enter a text prompt
  2. Choose an output style
  3. Click "Generate" to create the image

Can I use AI Image Editor for commercial purposes?

Yes, AI Image Editor's output can be used for commercial purposes, such as creating images for businesses or websites.

Are there any tips for getting the best results?

Here are some helpful tips for using AI Image Editor effectively:

  1. Be bold and creative with your prompts
  2. Experiment with simplicity in your descriptions
  3. Try different output styles to find the best fit for your project

Is there a limit to how many images I can create?

No, there are no limitations on the number of images you can generate using AI Image Editor. The tool is free to use as many times as you need.

Latest Traffic Insights

  • Monthly Visits

    193.90 M

  • Bounce Rate

    56.27%

  • Pages Per Visit

    2.71

  • Time on Site(s)

    115.91

  • Global Rank

    -

  • Country Rank

    -

Recent Visits

Traffic Sources

  • Social Media:
    0.48%
  • Paid Referrals:
    0.55%
  • Email:
    0.15%
  • Referrals:
    12.81%
  • Search Engines:
    16.21%
  • Direct:
    69.81%
More Data

Related Websites

Amote Extension
View Detail

Amote Extension

Amote Extension

Note: Improve the cart and checkout pages with effective upsell features to boost sales.

193.90 M
Batch Save ChatGPT to Notion

This is a guide on how to save multiple ChatGPT responses to Notion in a batch. 

Tools You'll Need:

* ChatGPT: An AI chatbot that can generate text.
* Notion: A note-taking and project management tool.
* Python: A programming language.
* Requests Library: A Python library for making HTTP requests.

Steps:

1. Get Your Notion API Token:
   - Go to your Notion workspace settings.
   - Navigate to the "Integrations" tab.
   - Click "Create new integration" and choose "API Token".
   - Copy your API token.

2. Install Python Libraries:
   - Open your terminal or command prompt.
   - Type `pip install requests` and press Enter.

3. Write Python Script:
   - Create a new Python file (e.g., `save_chatgpt_to_notion.py`).
   - Paste the following code into the file, replacing `YOUR_NOTION_API_TOKEN` with your actual token:

```python
import requests

def save_chatgpt_response_to_notion(response, page_id, token):
  """Saves a ChatGPT response to a Notion page."""
  url = f"https://api.notion.com/v1/pages/{page_id}/children"
  headers = {"Authorization": f"Bearer {token}"}
  data = {
    "parent": {
      "page_id": page_id
    },
    "properties": {
      "title": {
        "title": [
          {
            "text": {
              "content": "ChatGPT Response"
            }
          }
        ]
      },
      "content": {
        "rich_text": [
          {
            "text": {
              "content": response
            }
          }
        ]
      }
    }
  }
  response = requests.post(url, headers=headers, json=data)
  print(response.status_code)

Example usage
page_id = "YOUR_NOTION_PAGE_ID"
token = "YOUR_NOTION_API_TOKEN"

Get ChatGPT responses (replace with your actual ChatGPT interaction)
chatgpt_responses = [
  "This is the first ChatGPT response.",
  "This is the second ChatGPT response.",
  "This is the third ChatGPT response."
]

Save each response to Notion
for response in chatgpt_responses:
  save_chatgpt_response_to_notion(response, page_id, token)
```

4. Run the Script:
   - In your terminal, navigate to the directory where you saved the Python file.
   - Type `python save_chatgpt_to_notion.py` and press Enter.

5. Check Notion:
   - Open your Notion workspace and go to the page specified by `page_id`.
   - You should see your ChatGPT responses saved as separate blocks.
View Detail

Batch Save ChatGPT to Notion This is a guide on how to save multiple ChatGPT responses to Notion in a batch. Tools You'll Need: * ChatGPT: An AI chatbot that can generate text. * Notion: A note-taking and project management tool. * Python: A programming language. * Requests Library: A Python library for making HTTP requests. Steps: 1. Get Your Notion API Token: - Go to your Notion workspace settings. - Navigate to the "Integrations" tab. - Click "Create new integration" and choose "API Token". - Copy your API token. 2. Install Python Libraries: - Open your terminal or command prompt. - Type `pip install requests` and press Enter. 3. Write Python Script: - Create a new Python file (e.g., `save_chatgpt_to_notion.py`). - Paste the following code into the file, replacing `YOUR_NOTION_API_TOKEN` with your actual token: ```python import requests def save_chatgpt_response_to_notion(response, page_id, token): """Saves a ChatGPT response to a Notion page.""" url = f"https://api.notion.com/v1/pages/{page_id}/children" headers = {"Authorization": f"Bearer {token}"} data = { "parent": { "page_id": page_id }, "properties": { "title": { "title": [ { "text": { "content": "ChatGPT Response" } } ] }, "content": { "rich_text": [ { "text": { "content": response } } ] } } } response = requests.post(url, headers=headers, json=data) print(response.status_code) Example usage page_id = "YOUR_NOTION_PAGE_ID" token = "YOUR_NOTION_API_TOKEN" Get ChatGPT responses (replace with your actual ChatGPT interaction) chatgpt_responses = [ "This is the first ChatGPT response.", "This is the second ChatGPT response.", "This is the third ChatGPT response." ] Save each response to Notion for response in chatgpt_responses: save_chatgpt_response_to_notion(response, page_id, token) ``` 4. Run the Script: - In your terminal, navigate to the directory where you saved the Python file. - Type `python save_chatgpt_to_notion.py` and press Enter. 5. Check Notion: - Open your Notion workspace and go to the page specified by `page_id`. - You should see your ChatGPT responses saved as separate blocks.

Batch Save ChatGPT to Notion This is a guide on how to save multiple ChatGPT responses to Notion in a batch. Tools You'll Need: * ChatGPT: An AI chatbot that can generate text. * Notion: A note-taking and project management tool. * Python: A programming language. * Requests Library: A Python library for making HTTP requests. Steps: 1. Get Your Notion API Token: - Go to your Notion workspace settings. - Navigate to the "Integrations" tab. - Click "Create new integration" and choose "API Token". - Copy your API token. 2. Install Python Libraries: - Open your terminal or command prompt. - Type `pip install requests` and press Enter. 3. Write Python Script: - Create a new Python file (e.g., `save_chatgpt_to_notion.py`). - Paste the following code into the file, replacing `YOUR_NOTION_API_TOKEN` with your actual token: ```python import requests def save_chatgpt_response_to_notion(response, page_id, token): """Saves a ChatGPT response to a Notion page.""" url = f"https://api.notion.com/v1/pages/{page_id}/children" headers = {"Authorization": f"Bearer {token}"} data = { "parent": { "page_id": page_id }, "properties": { "title": { "title": [ { "text": { "content": "ChatGPT Response" } } ] }, "content": { "rich_text": [ { "text": { "content": response } } ] } } } response = requests.post(url, headers=headers, json=data) print(response.status_code) Example usage page_id = "YOUR_NOTION_PAGE_ID" token = "YOUR_NOTION_API_TOKEN" Get ChatGPT responses (replace with your actual ChatGPT interaction) chatgpt_responses = [ "This is the first ChatGPT response.", "This is the second ChatGPT response.", "This is the third ChatGPT response." ] Save each response to Notion for response in chatgpt_responses: save_chatgpt_response_to_notion(response, page_id, token) ``` 4. Run the Script: - In your terminal, navigate to the directory where you saved the Python file. - Type `python save_chatgpt_to_notion.py` and press Enter. 5. Check Notion: - Open your Notion workspace and go to the page specified by `page_id`. - You should see your ChatGPT responses saved as separate blocks.

Save ChatGPT Conversations to Notion with One Click Export your ChatGPT conversations directly to Notion with a single click.

193.90 M
CreMind GPT Free
View Detail

CreMind GPT Free

CreMind GPT Free

Unlocking the Potential of AI GPT Technology: Empowering Productivity with this Feature-Packed Extension

193.90 M
TradeSage - TradingView Enhancement Suite
View Detail

TradeSage - TradingView Enhancement Suite

TradeSage - TradingView Enhancement Suite

Your trading copilot powered by ChatGPT Pine Script generator

193.90 M
ImageKit AI for media delivery and management | ImageKit.io
View Detail

ImageKit AI for media delivery and management | ImageKit.io

ImageKit AI for media delivery and management | ImageKit.io

Leverage AI and Generative AI to transform media processing and digital asset management at scale with ImageKit AI.

1.06 M
BlockBeats Search - Your Blockchain News Assistant, covering crypto, blockchain, AI, and Web 3.0.
View Detail

BlockBeats Search - Your Blockchain News Assistant, covering crypto, blockchain, AI, and Web 3.0.

BlockBeats Search - Your Blockchain News Assistant, covering crypto, blockchain, AI, and Web 3.0.

When users search for blockchain news on Google/Bing/Baidu, this plugin can intelligently display more comprehensive and in-depth content in the browser's right-side knowledge area. Whether you are a blockchain technology enthusiast, investor, or researcher, the Blockchain News Assistant can help you quickly access high-quality information and improve your reading and research efficiency.

193.90 M
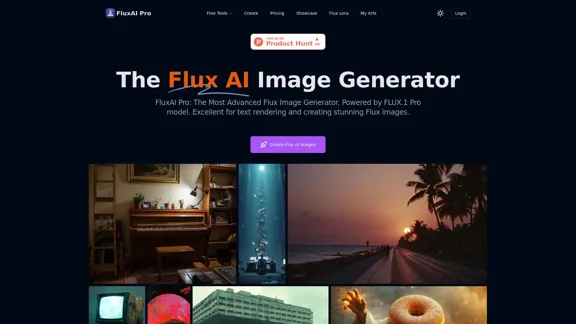
FluxAI Pro - Advanced Flux Image Generator
View Detail

FluxAI Pro - Advanced Flux Image Generator

FluxAI Pro - Advanced Flux Image Generator

FluxAI Pro: Superior Flux Image Generator with exceptional text rendering. Powered by FLUX.1 Pro, Dev, Schnell and Realism models.

171.41 K
Journey ArtPrompt with Midjourney

This guide will walk you through creating stunning artwork using Midjourney, a powerful AI art generator. 

1. Accessing Midjourney

* You'll need a Discord account to use Midjourney. 
* Join the official Midjourney server: [https://discord.gg/midjourney](https://discord.gg/midjourney)

2. Understanding the Basics

* `/imagine` Command: This is the core command for generating images.
* Prompt:  A text description of the artwork you want to create. Be specific and descriptive!
* Parameters: Options that control aspects like image size, aspect ratio, and style.

3. Crafting Your Journey Prompt

Think about the story you want to tell with your artwork.  

* Setting: Where does your journey take place? (e.g., a mystical forest, a futuristic city, a desolate wasteland)
* Characters: Who is on this journey? (e.g., a lone traveler, a group of adventurers, mythical creatures)
* Mood: What feeling do you want to evoke? (e.g., adventurous, mysterious, hopeful, melancholic)
* Style: What artistic style appeals to you? (e.g., photorealistic, painterly, abstract)

4. Putting it Together

Combine these elements into a clear and concise prompt. 

Example:

`/imagine A lone traveler journeys through a mystical forest at sunset, bathed in golden light. The path ahead is shrouded in mist, hinting at unknown wonders. Style: painterly, ethereal`

5. Experiment and Refine

* Midjourney is all about experimentation! Try different prompts, parameters, and styles.
* Use the "upscale" command to enlarge your favorite images and reveal more detail.
* Don't be afraid to iterate and refine your prompts based on the results.
View Detail

Journey ArtPrompt with Midjourney This guide will walk you through creating stunning artwork using Midjourney, a powerful AI art generator. 1. Accessing Midjourney * You'll need a Discord account to use Midjourney. * Join the official Midjourney server: [https://discord.gg/midjourney](https://discord.gg/midjourney) 2. Understanding the Basics * `/imagine` Command: This is the core command for generating images. * Prompt: A text description of the artwork you want to create. Be specific and descriptive! * Parameters: Options that control aspects like image size, aspect ratio, and style. 3. Crafting Your Journey Prompt Think about the story you want to tell with your artwork. * Setting: Where does your journey take place? (e.g., a mystical forest, a futuristic city, a desolate wasteland) * Characters: Who is on this journey? (e.g., a lone traveler, a group of adventurers, mythical creatures) * Mood: What feeling do you want to evoke? (e.g., adventurous, mysterious, hopeful, melancholic) * Style: What artistic style appeals to you? (e.g., photorealistic, painterly, abstract) 4. Putting it Together Combine these elements into a clear and concise prompt. Example: `/imagine A lone traveler journeys through a mystical forest at sunset, bathed in golden light. The path ahead is shrouded in mist, hinting at unknown wonders. Style: painterly, ethereal` 5. Experiment and Refine * Midjourney is all about experimentation! Try different prompts, parameters, and styles. * Use the "upscale" command to enlarge your favorite images and reveal more detail. * Don't be afraid to iterate and refine your prompts based on the results.

Journey ArtPrompt with Midjourney This guide will walk you through creating stunning artwork using Midjourney, a powerful AI art generator. 1. Accessing Midjourney * You'll need a Discord account to use Midjourney. * Join the official Midjourney server: [https://discord.gg/midjourney](https://discord.gg/midjourney) 2. Understanding the Basics * `/imagine` Command: This is the core command for generating images. * Prompt: A text description of the artwork you want to create. Be specific and descriptive! * Parameters: Options that control aspects like image size, aspect ratio, and style. 3. Crafting Your Journey Prompt Think about the story you want to tell with your artwork. * Setting: Where does your journey take place? (e.g., a mystical forest, a futuristic city, a desolate wasteland) * Characters: Who is on this journey? (e.g., a lone traveler, a group of adventurers, mythical creatures) * Mood: What feeling do you want to evoke? (e.g., adventurous, mysterious, hopeful, melancholic) * Style: What artistic style appeals to you? (e.g., photorealistic, painterly, abstract) 4. Putting it Together Combine these elements into a clear and concise prompt. Example: `/imagine A lone traveler journeys through a mystical forest at sunset, bathed in golden light. The path ahead is shrouded in mist, hinting at unknown wonders. Style: painterly, ethereal` 5. Experiment and Refine * Midjourney is all about experimentation! Try different prompts, parameters, and styles. * Use the "upscale" command to enlarge your favorite images and reveal more detail. * Don't be afraid to iterate and refine your prompts based on the results.

New backgrounds with Midjourney on new tabs

193.90 M