Open-source RightAI Tools Directory
  • Discover AI
  • Submit
  • Startup
  • Blog
Open-source RightAI Tools Directory
Discover the best AI tools of 2025 with the RightAI Tools Directory!

Friend Links

AI Anime GeneratorToolsApp AI

Support

Tap4
Privacy policyTerms & ConditionsContact Us
Loading...
loading...

KauGPT

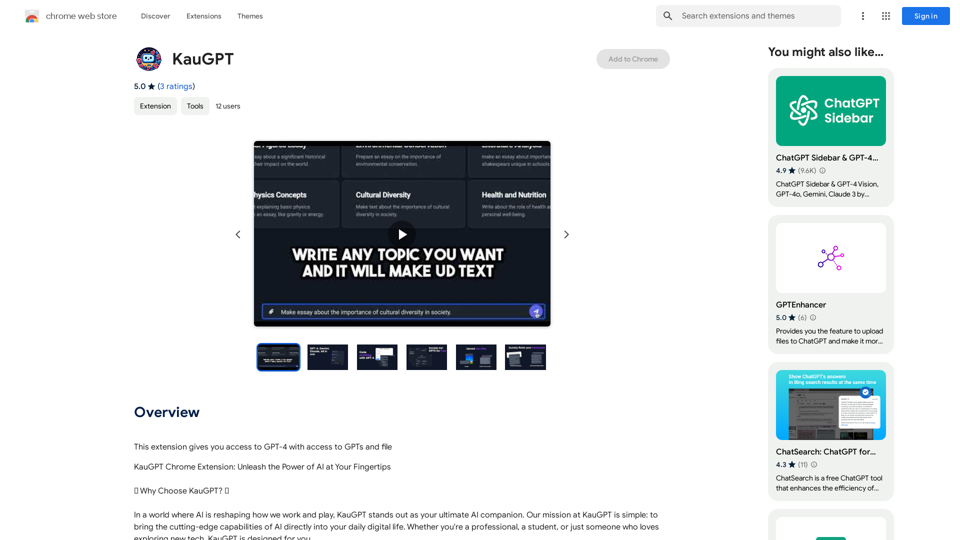
This extension gives you access to GPT-4, along with access to other GPT models and files.
Visit Website
KauGPT
Visit Website

Introduction

KauGPT is a powerful Chrome extension that enhances your online experience by integrating GPT-4 technology and providing file flexibility. This innovative tool allows users to interact with various file text types, access real-time information, and customize their AI experience. KauGPT is designed for professionals, students, and tech enthusiasts alike, offering a range of features to streamline online activities and boost productivity.

Feature

GPT-4 Integration

KauGPT incorporates the latest GPT-4 technology, known for its advanced understanding and response capabilities. This integration enables users to experience cutting-edge AI functionality directly within their browser.

File Flexibility

Users can interact with a variety of file text types, making their online experience more dynamic and versatile. This feature enhances productivity by allowing seamless interaction with different file formats.

Connected World

KauGPT keeps users updated with real-time information from various providers. This feature ensures that users have access to the most current data and insights while browsing.

Customizable AI Experience

Utilizing GPTs Beta, KauGPT offers users the ability to choose from expertly crafted templates or create their own unique GPT experience. This customization allows for a tailored AI interaction that suits individual needs and preferences.

Image Creator

KauGPT includes GPTs Stable Diffusion, providing access to a high-quality, free image creator with DALL·E 3 quality. This feature enables users to generate unique images directly within the extension.

FAQ

Is KauGPT free to use?

Yes, KauGPT is a free Chrome extension that can be used without any subscription fees.

What browsers are compatible with KauGPT?

KauGPT is compatible with Chrome, Edge, ChromeOS, MacOS, and Windows, making it accessible to a wide range of users across different platforms.

How can I make the most of KauGPT?

To maximize your KauGPT experience:

  1. Use it to streamline your online activities with its powerful features
  2. Customize the AI experience to suit your specific needs
  3. Stay updated with real-time information from various providers
  4. Explore the image creation capabilities for unique visual content

Who can benefit from using KauGPT?

KauGPT is designed for a wide range of users, including:

  • Professionals seeking to enhance productivity
  • Students looking for research and study assistance
  • Tech enthusiasts interested in exploring AI capabilities
  • Anyone who wants to streamline their online activities with advanced AI tools

Related Websites
SoBrief.com: World's Largest Book Summary Site
View Detail

SoBrief.com: World's Largest Book Summary Site

SoBrief.com: World's Largest Book Summary Site

Explore 73,530 free non-fiction book summaries with audio. 12 key takeaways in 10 minutes each. 10x more books than any other site. Every imaginable topic.

1.14 M
Chrome Web Store
View Detail

Chrome Web Store

Chrome Web Store

Add new features to your browser and personalize your browsing experience.

193.90 M
Texta.ai: AI Copilot and AI Writer Assistant
View Detail

Texta.ai: AI Copilot and AI Writer Assistant

Texta.ai: AI Copilot and AI Writer Assistant

Boost your writing. Get answers to complex questions. Generate any content. Summarize and Paraphrase. Powered by GPT-4, ChatGPT.

193.90 M
ChatGPT Keyboard Shortcuts

#Navigation

* Ctrl + →: Move to the next message
* Ctrl + ←: Move to the previous message
* Home: Move to the beginning of the conversation
* End: Move to the end of the conversation

#Editing

* Ctrl + A: Select all text
* Ctrl + C: Copy selected text
* Ctrl + X: Cut selected text
* Ctrl + V: Paste copied or cut text
* Ctrl + Z: Undo
* Ctrl + Y: Redo
* Ctrl + Shift + F: Format text as code

#Actions

* Enter: Send the message
* Shift + Enter: Insert a new line
* Ctrl + Shift + Enter: Send the message and insert a new line
* Esc: Cancel editing and close the message input field
* Ctrl + Shift + Space: Open the emoji picker
* Ctrl + Shift + /: Open the help menu

#Accessibility

* Ctrl + +: Increase font size
* Ctrl + -: Decrease font size
* Ctrl + 0: Reset font size to default
View Detail

ChatGPT Keyboard Shortcuts #Navigation * Ctrl + →: Move to the next message * Ctrl + ←: Move to the previous message * Home: Move to the beginning of the conversation * End: Move to the end of the conversation #Editing * Ctrl + A: Select all text * Ctrl + C: Copy selected text * Ctrl + X: Cut selected text * Ctrl + V: Paste copied or cut text * Ctrl + Z: Undo * Ctrl + Y: Redo * Ctrl + Shift + F: Format text as code #Actions * Enter: Send the message * Shift + Enter: Insert a new line * Ctrl + Shift + Enter: Send the message and insert a new line * Esc: Cancel editing and close the message input field * Ctrl + Shift + Space: Open the emoji picker * Ctrl + Shift + /: Open the help menu #Accessibility * Ctrl + +: Increase font size * Ctrl + -: Decrease font size * Ctrl + 0: Reset font size to default

ChatGPT Keyboard Shortcuts #Navigation * Ctrl + →: Move to the next message * Ctrl + ←: Move to the previous message * Home: Move to the beginning of the conversation * End: Move to the end of the conversation #Editing * Ctrl + A: Select all text * Ctrl + C: Copy selected text * Ctrl + X: Cut selected text * Ctrl + V: Paste copied or cut text * Ctrl + Z: Undo * Ctrl + Y: Redo * Ctrl + Shift + F: Format text as code #Actions * Enter: Send the message * Shift + Enter: Insert a new line * Ctrl + Shift + Enter: Send the message and insert a new line * Esc: Cancel editing and close the message input field * Ctrl + Shift + Space: Open the emoji picker * Ctrl + Shift + /: Open the help menu #Accessibility * Ctrl + +: Increase font size * Ctrl + -: Decrease font size * Ctrl + 0: Reset font size to default

Enhance your ChatGPT experience with easy-to-use keyboard shortcuts.

193.90 M
Get ChatGPT for Free with Google

You can now access ChatGPT, a powerful language model, for free with Google. Here's how:

Method 1: Google Colab

* Open Google Colab ([colab.research.google.com](http://colab.research.google.com))
* Create a new notebook
* Install the `transformers` library by running `!pip install transformers`
* Import the `transformers` library and load the ChatGPT model using `from transformers import AutoModelForCausalLM, AutoTokenizer; model = AutoModelForCausalLM.from_pretrained('chatgpt'); tokenizer = AutoTokenizer.from_pretrained('chatgpt')`
* Use the model to generate text using `input_text = "Your input here"; inputs = tokenizer.encode_plus(input_text, return_tensors='pt', max_length=1024, padding='max_length', truncation=True); output = model(inputs['input_ids'], attention_mask=inputs['attention_mask']); print(tokenizer.decode(output.logits[0], skip_special_tokens=True))`

Method 2: Google Apps Script

* Open Google Apps Script ([script.google.com](http://script.google.com))
* Create a new project
* Install the `transformers` library by running `npm install transformers`
* Import the `transformers` library and load the ChatGPT model using `const { AutoModelForCausalLM, AutoTokenizer } = require('transformers'); const model = new AutoModelForCausalLM('chatgpt'); const tokenizer = new AutoTokenizer('chatgpt');`
* Use the model to generate text using `const inputText = "Your input here"; const inputs = tokenizer.encodePlus(inputText, { return_tensors: 'pt', max_length: 1024, padding: 'max_length', truncation: true }); const output = model(inputs.inputIds, inputs.attentionMask); console.log(tokenizer.decode(output.logits[0], { skipSpecialTokens: true }));`

Note: These methods require some technical knowledge and may have limitations compared to the original ChatGPT model.
View Detail

Get ChatGPT for Free with Google You can now access ChatGPT, a powerful language model, for free with Google. Here's how: Method 1: Google Colab * Open Google Colab ([colab.research.google.com](http://colab.research.google.com)) * Create a new notebook * Install the `transformers` library by running `!pip install transformers` * Import the `transformers` library and load the ChatGPT model using `from transformers import AutoModelForCausalLM, AutoTokenizer; model = AutoModelForCausalLM.from_pretrained('chatgpt'); tokenizer = AutoTokenizer.from_pretrained('chatgpt')` * Use the model to generate text using `input_text = "Your input here"; inputs = tokenizer.encode_plus(input_text, return_tensors='pt', max_length=1024, padding='max_length', truncation=True); output = model(inputs['input_ids'], attention_mask=inputs['attention_mask']); print(tokenizer.decode(output.logits[0], skip_special_tokens=True))` Method 2: Google Apps Script * Open Google Apps Script ([script.google.com](http://script.google.com)) * Create a new project * Install the `transformers` library by running `npm install transformers` * Import the `transformers` library and load the ChatGPT model using `const { AutoModelForCausalLM, AutoTokenizer } = require('transformers'); const model = new AutoModelForCausalLM('chatgpt'); const tokenizer = new AutoTokenizer('chatgpt');` * Use the model to generate text using `const inputText = "Your input here"; const inputs = tokenizer.encodePlus(inputText, { return_tensors: 'pt', max_length: 1024, padding: 'max_length', truncation: true }); const output = model(inputs.inputIds, inputs.attentionMask); console.log(tokenizer.decode(output.logits[0], { skipSpecialTokens: true }));` Note: These methods require some technical knowledge and may have limitations compared to the original ChatGPT model.

Get ChatGPT for Free with Google You can now access ChatGPT, a powerful language model, for free with Google. Here's how: Method 1: Google Colab * Open Google Colab ([colab.research.google.com](http://colab.research.google.com)) * Create a new notebook * Install the `transformers` library by running `!pip install transformers` * Import the `transformers` library and load the ChatGPT model using `from transformers import AutoModelForCausalLM, AutoTokenizer; model = AutoModelForCausalLM.from_pretrained('chatgpt'); tokenizer = AutoTokenizer.from_pretrained('chatgpt')` * Use the model to generate text using `input_text = "Your input here"; inputs = tokenizer.encode_plus(input_text, return_tensors='pt', max_length=1024, padding='max_length', truncation=True); output = model(inputs['input_ids'], attention_mask=inputs['attention_mask']); print(tokenizer.decode(output.logits[0], skip_special_tokens=True))` Method 2: Google Apps Script * Open Google Apps Script ([script.google.com](http://script.google.com)) * Create a new project * Install the `transformers` library by running `npm install transformers` * Import the `transformers` library and load the ChatGPT model using `const { AutoModelForCausalLM, AutoTokenizer } = require('transformers'); const model = new AutoModelForCausalLM('chatgpt'); const tokenizer = new AutoTokenizer('chatgpt');` * Use the model to generate text using `const inputText = "Your input here"; const inputs = tokenizer.encodePlus(inputText, { return_tensors: 'pt', max_length: 1024, padding: 'max_length', truncation: true }); const output = model(inputs.inputIds, inputs.attentionMask); console.log(tokenizer.decode(output.logits[0], { skipSpecialTokens: true }));` Note: These methods require some technical knowledge and may have limitations compared to the original ChatGPT model.

How to Add ChatGPT to All Google Searches ===================================================== Step 1: Create a Custom Search Engine -------------------------------------- * Go to the [Google Custom Search Engine](https://cse.google.com/) website and sign in with your Google account. * Click on the "New Search Engine" button. * Fill in the required information, such as the name and description of your search engine. * Click on the "Create" button. Step 2: Add ChatGPT to the Search Engine ----------------------------------------- * In the "Setup" tab, click on the "Add" button next to "Sites to search". * Enter the following URL: `https://chat.openai.com/` * Click on the "Add" button. Step 3: Configure the Search Engine -------------------------------------- * In the "Setup" tab, click on the "Edit" button next to "Search engine keywords". * Add the following keywords: `ChatGPT` * Click on the "Save" button. Step 4: Get the Search Engine Code ------------------------------------- * In the "Setup" tab, click on the "Get code" button. * Copy the HTML code provided. Step 5: Add the Search Engine to Your Browser ------------------------------------------------ * Open your browser and go to the "Settings" or "Options" page. * Look for the "Search engine" or "Default search engine" option. * Click on the "Add" or "Manage search engines" button. * Paste the HTML code you copied earlier. * Click on the "Add" or "Save" button. You're Done! =============== Now, whenever you search on Google, ChatGPT will be included in the search results. You can also use the custom search engine URL provided by Google to search directly.

193.90 M
WiseGPT
View Detail

WiseGPT

WiseGPT

Autocomplete and personal prompts for ChatGPT.

193.90 M
GPT Netherlands Assistant
View Detail

GPT Netherlands Assistant

GPT Netherlands Assistant

A free, ad-free, fast add-on for ChatGPT on the German community page with links to top websites.

193.90 M
VNEdu Tool
View Detail

VNEdu Tool

VNEdu Tool

VNEDU Data Processing Tool

193.90 M