Open-source RightAI Tools Directory
  • Discover AI
  • Submit
  • Startup
  • Blog
Open-source RightAI Tools Directory
Discover the best AI tools of 2025 with the RightAI Tools Directory!

Friend Links

AI Anime GeneratorToolsApp AI

Support

Tap4
Privacy policyTerms & ConditionsContact Us
Loading...
loading...

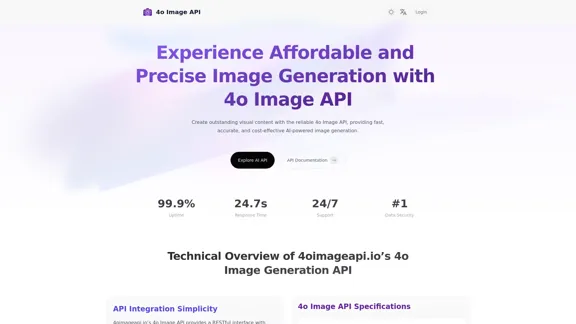
4o Image API: Affordable, Stable, and Versatile AI Image Generation

4oimageapi.io’s 4o Image API provides affordable, stable, and accurate AI image generation, allowing creators to easily produce high-quality visuals. With features such as text-to-image and image-to-image transformations, along with a variety of artistic styles, it offers dependable and effective tools for creative projects.
Visit Website
4o Image API: Affordable, Stable, and Versatile AI Image Generation
Visit Website

Introduction

4oimageapi.io’s 4o Image API offers an affordable and reliable solution for AI-powered image generation. It enables users to create high-quality visual content quickly and accurately, making it suitable for various applications, from marketing to product visualization. The API is designed for ease of integration, providing comprehensive documentation and support to ensure a smooth user experience.

Feature

  1. Image-to-Image Generation

    Users can upload images and modify them based on detailed prompts, allowing for style transfer and content enhancement.

  2. Text-to-Image Conversion

    The API accurately transforms text prompts into high-quality images, capturing specific scenes or abstract concepts with remarkable detail.

  3. Text Rendering

    It excels at integrating clear text into images, making it ideal for infographics, signs, and advertisements.

  4. Versatile Style Transformation

    Supports a wide range of artistic styles, enabling users to tailor images to fit their creative vision.

  5. Fast Response Time

    The API is optimized for speed, delivering high-quality visuals within seconds to a minute.

  6. High-Concurrency Support

    Capable of handling multiple image generation requests simultaneously, ensuring reliable performance under heavy usage.

  7. 24/7 Customer Support

    Offers dedicated support to assist users with integration issues and advanced features.

How to Use?

  1. Register for an account on 4oimageapi.io to access the API features.
  2. Generate your unique API key after logging in.
  3. Follow the detailed instructions in the developer documentation to integrate the API into your application.

FAQ

What makes 4oimageapi.io’s 4o Image Generation API unique?

The API stands out due to its seamless integration, fast processing times, and high-quality outputs, offering flexible image generation capabilities.

What is the pricing for 4oimageapi.io’s ChatGPT image generation API?

4oimageapi.io provides flexible and transparent pricing designed for businesses of all sizes, allowing for scalable usage without high costs.

How can 4oimageapi.io’s GPT-4o Image API improve your creative workflow?

It enables rapid generation of high-quality visuals from text prompts or modifications of existing images, streamlining the design process.

Does 4oimageapi.io offer a free trial for the OpenAI Image Generation API?

Yes, a free trial is available, allowing users to test the API's capabilities before committing to a paid plan.

Price

Plan TypePrice
Free Plan$0/month
Basic Plan$9.99/month
Standard Plan$19.99/month
Professional Plan$49.99/month
The price is for reference only, please refer to the latest official data for actual information.

Evaluation

  1. The 4o Image API demonstrates strong capabilities in generating high-quality images quickly, making it suitable for various applications.
  2. The integration process is straightforward, supported by comprehensive documentation.
  3. However, the API's performance may vary based on the complexity of the prompts, which could affect user experience.
  4. While the API excels in many areas, expanding the range of artistic styles and improving the accuracy of text rendering could enhance its appeal further.
  5. Overall, it is a valuable tool for businesses and creatives looking to streamline their visual content creation process.

Latest Traffic Insights

  • Monthly Visits

    0

  • Bounce Rate

    0.00%

  • Pages Per Visit

    0.00

  • Time on Site(s)

    0.00

  • Global Rank

    -

  • Country Rank

    -

Recent Visits

Traffic Sources

  • Social Media:
    0.00%
  • Paid Referrals:
    0.00%
  • Email:
    0.00%
  • Referrals:
    0.00%
  • Search Engines:
    0.00%
  • Direct:
    0.00%
More Data

Related Websites

CodeMoss
View Detail

CodeMoss

CodeMoss

CodeMoss - AI-Powered Code Search

205.80 M
Midjourney API - Automate Midjourney AI Image Generation 

This document outlines how to use the Midjourney API to automate the generation of AI images. 

What is the Midjourney API?

The Midjourney API allows developers to programmatically interact with the powerful Midjourney AI model. This means you can generate images, control various parameters, and integrate Midjourney into your own applications and workflows.

Why Use the Midjourney API?

* Automation: Automate the creation of images for various purposes, such as marketing materials, website content, or research projects.
* Customization: Fine-tune image generation by controlling parameters like aspect ratio, style, and seed values.
* Integration: Seamlessly integrate Midjourney's capabilities into your existing tools and platforms.

Getting Started

1. Sign Up for a Midjourney Account: You'll need a Midjourney account to access the API.

2. Obtain an API Key: Once you have an account, you can generate an API key from your account settings.

3. Choose a Programming Language: The Midjourney API supports various programming languages, including Python, JavaScript, and Go.

4. Install the API Client: Install the appropriate API client library for your chosen language.

5. Start Generating Images: Use the API client to send image generation requests to the Midjourney server.

Example (Python):

```python
import midjourney

Replace with your actual API key
api_key = "YOUR_API_KEY"

Create a Midjourney client
client = midjourney.Client(api_key=api_key)

Generate an image
response = client.create_image(prompt="A cat wearing a hat", num_images=1)

Print the image URL
print(response.images[0].url)
```

Documentation and Resources

For detailed information about the Midjourney API, including available endpoints, parameters, and examples, please refer to the official documentation: [https://docs.midjourney.com/](https://docs.midjourney.com/)
View Detail

Midjourney API - Automate Midjourney AI Image Generation This document outlines how to use the Midjourney API to automate the generation of AI images. What is the Midjourney API? The Midjourney API allows developers to programmatically interact with the powerful Midjourney AI model. This means you can generate images, control various parameters, and integrate Midjourney into your own applications and workflows. Why Use the Midjourney API? * Automation: Automate the creation of images for various purposes, such as marketing materials, website content, or research projects. * Customization: Fine-tune image generation by controlling parameters like aspect ratio, style, and seed values. * Integration: Seamlessly integrate Midjourney's capabilities into your existing tools and platforms. Getting Started 1. Sign Up for a Midjourney Account: You'll need a Midjourney account to access the API. 2. Obtain an API Key: Once you have an account, you can generate an API key from your account settings. 3. Choose a Programming Language: The Midjourney API supports various programming languages, including Python, JavaScript, and Go. 4. Install the API Client: Install the appropriate API client library for your chosen language. 5. Start Generating Images: Use the API client to send image generation requests to the Midjourney server. Example (Python): ```python import midjourney Replace with your actual API key api_key = "YOUR_API_KEY" Create a Midjourney client client = midjourney.Client(api_key=api_key) Generate an image response = client.create_image(prompt="A cat wearing a hat", num_images=1) Print the image URL print(response.images[0].url) ``` Documentation and Resources For detailed information about the Midjourney API, including available endpoints, parameters, and examples, please refer to the official documentation: [https://docs.midjourney.com/](https://docs.midjourney.com/)

Midjourney API - Automate Midjourney AI Image Generation This document outlines how to use the Midjourney API to automate the generation of AI images. What is the Midjourney API? The Midjourney API allows developers to programmatically interact with the powerful Midjourney AI model. This means you can generate images, control various parameters, and integrate Midjourney into your own applications and workflows. Why Use the Midjourney API? * Automation: Automate the creation of images for various purposes, such as marketing materials, website content, or research projects. * Customization: Fine-tune image generation by controlling parameters like aspect ratio, style, and seed values. * Integration: Seamlessly integrate Midjourney's capabilities into your existing tools and platforms. Getting Started 1. Sign Up for a Midjourney Account: You'll need a Midjourney account to access the API. 2. Obtain an API Key: Once you have an account, you can generate an API key from your account settings. 3. Choose a Programming Language: The Midjourney API supports various programming languages, including Python, JavaScript, and Go. 4. Install the API Client: Install the appropriate API client library for your chosen language. 5. Start Generating Images: Use the API client to send image generation requests to the Midjourney server. Example (Python): ```python import midjourney Replace with your actual API key api_key = "YOUR_API_KEY" Create a Midjourney client client = midjourney.Client(api_key=api_key) Generate an image response = client.create_image(prompt="A cat wearing a hat", num_images=1) Print the image URL print(response.images[0].url) ``` Documentation and Resources For detailed information about the Midjourney API, including available endpoints, parameters, and examples, please refer to the official documentation: [https://docs.midjourney.com/](https://docs.midjourney.com/)

Easily integrate Midjourney AI into your apps using the Midjourney API. Start creating AI images automatically today!

0
meetXcc: AI Meeting Notes for Google Meet
View Detail

meetXcc: AI Meeting Notes for Google Meet

meetXcc: AI Meeting Notes for Google Meet

Automated meeting documentation via transcripts, summaries and intuitive AI-generated mind maps.

205.80 M
Recally - The Best Screenshot Management App for macOS
View Detail

Recally - The Best Screenshot Management App for macOS

Recally - The Best Screenshot Management App for macOS

Recally is the best app to manage your screenshots on macOS. Organize, browse, and search your screenshots with ease. Available on macOS.

0
FLUX Canny - Advanced AI Tool for Image Generation with Edge Guidance
View Detail

FLUX Canny - Advanced AI Tool for Image Generation with Edge Guidance

FLUX Canny - Advanced AI Tool for Image Generation with Edge Guidance

FLUX Canny - A professional edge-guided AI image generation tool. Transform sketches into stunning artwork with precise structural control.

0
IC-Light V2 - Advanced AI Image Processing Tool
View Detail

IC-Light V2 - Advanced AI Image Processing Tool

IC-Light V2 - Advanced AI Image Processing Tool

IC-Light V2: AI image enhancement tool with Flux models and VAE technology. Transform lighting and enhance image quality. Try our free demo today.

1.41 K
Simplified Chrome Extension

This is a basic Chrome extension designed to be easy to understand and modify. 

Manifest File (manifest.json):

```json
{
  "manifest_version": 3,
  "name": "Simplified Extension",
  "version": "1.0",
  "description": "A simple Chrome extension example.",
  "permissions": [
    "activeTab"
  ],
  "action": {
    "default_popup": "popup.html"
  }
}
```

Popup HTML (popup.html):

```html
<!DOCTYPE html>
<html>
<head>
  <title>Simplified Extension</title>
</head>
<body>
  <h1>Hello from the extension!</h1>
  <p>This is a simple popup.</p>
</body>
</html>
```

Explanation:

* manifest.json: This file tells Chrome what your extension does.
    * `manifest_version`: Specifies the version of the manifest file format.
    * `name`: The name of your extension.
    * `version`: The current version of your extension.
    * `description`: A brief description of your extension.
    * `permissions`: Lists the permissions your extension needs to function. Here, it needs access to the active tab.
    * `action`: Defines the popup that appears when the extension icon is clicked.

* popup.html: This file contains the HTML code for the popup window.

How it works:

1. When you install the extension, Chrome reads the `manifest.json` file.
2. When you click the extension icon, Chrome opens the `popup.html` file in a new window.
3. The popup displays the "Hello from the extension!" message.
View Detail

Simplified Chrome Extension This is a basic Chrome extension designed to be easy to understand and modify. Manifest File (manifest.json): ```json { "manifest_version": 3, "name": "Simplified Extension", "version": "1.0", "description": "A simple Chrome extension example.", "permissions": [ "activeTab" ], "action": { "default_popup": "popup.html" } } ``` Popup HTML (popup.html): ```html <!DOCTYPE html> <html> <head> <title>Simplified Extension</title> </head> <body> <h1>Hello from the extension!</h1> <p>This is a simple popup.</p> </body> </html> ``` Explanation: * manifest.json: This file tells Chrome what your extension does. * `manifest_version`: Specifies the version of the manifest file format. * `name`: The name of your extension. * `version`: The current version of your extension. * `description`: A brief description of your extension. * `permissions`: Lists the permissions your extension needs to function. Here, it needs access to the active tab. * `action`: Defines the popup that appears when the extension icon is clicked. * popup.html: This file contains the HTML code for the popup window. How it works: 1. When you install the extension, Chrome reads the `manifest.json` file. 2. When you click the extension icon, Chrome opens the `popup.html` file in a new window. 3. The popup displays the "Hello from the extension!" message.

Simplified Chrome Extension This is a basic Chrome extension designed to be easy to understand and modify. Manifest File (manifest.json): ```json { "manifest_version": 3, "name": "Simplified Extension", "version": "1.0", "description": "A simple Chrome extension example.", "permissions": [ "activeTab" ], "action": { "default_popup": "popup.html" } } ``` Popup HTML (popup.html): ```html <!DOCTYPE html> <html> <head> <title>Simplified Extension</title> </head> <body> <h1>Hello from the extension!</h1> <p>This is a simple popup.</p> </body> </html> ``` Explanation: * manifest.json: This file tells Chrome what your extension does. * `manifest_version`: Specifies the version of the manifest file format. * `name`: The name of your extension. * `version`: The current version of your extension. * `description`: A brief description of your extension. * `permissions`: Lists the permissions your extension needs to function. Here, it needs access to the active tab. * `action`: Defines the popup that appears when the extension icon is clicked. * popup.html: This file contains the HTML code for the popup window. How it works: 1. When you install the extension, Chrome reads the `manifest.json` file. 2. When you click the extension icon, Chrome opens the `popup.html` file in a new window. 3. The popup displays the "Hello from the extension!" message.

Design & Collaborate Marketing made easy #Simplified

205.80 M
FLUX dev: A groundbreaking AI model for generating images with open weights.
View Detail

FLUX dev: A groundbreaking AI model for generating images with open weights.

FLUX dev: A groundbreaking AI model for generating images with open weights.

Explore FLUX dev, the advanced open-weight AI image generation model. Discover its features for non-commercial use and try it now for free.

32.63 K