Z list

Z lister is a powerful AI tool for real estate agents!
Visit Website
Z list

Introduction

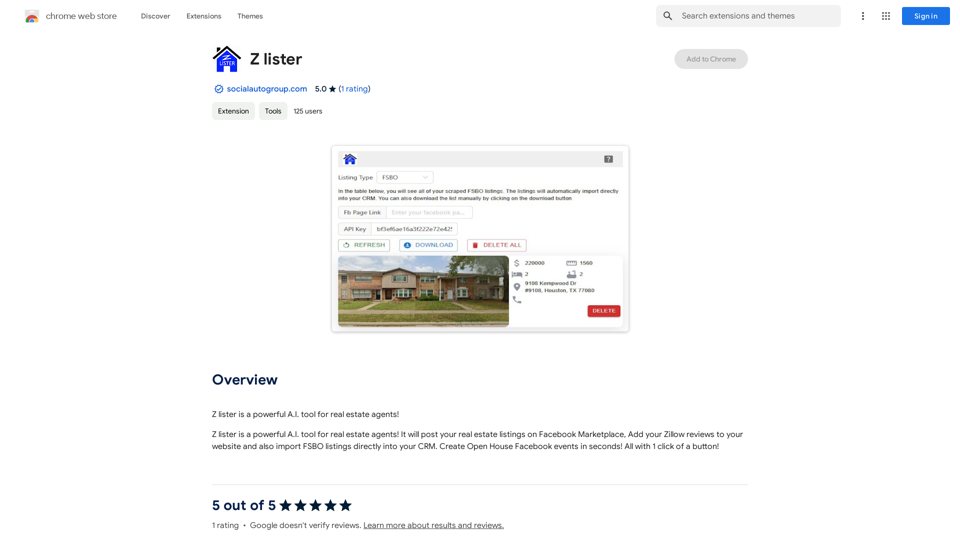
Z Lister is an innovative AI-powered tool designed specifically for real estate agents. It aims to enhance their workflow efficiency and boost their online visibility. The platform offers a range of features including seamless integration with Facebook Marketplace for listing posts, incorporation of Zillow reviews into agents' websites, and the ability to import For Sale By Owner (FSBO) listings directly into Customer Relationship Management (CRM) systems.

Feature

Facebook Marketplace Integration

Z Lister enables real estate agents to post their property listings on Facebook Marketplace effortlessly with a single click, expanding their reach to potential buyers.

Zillow Review Integration

Agents can easily showcase their expertise by adding their Zillow reviews to their websites, building trust and credibility with prospective clients.

FSBO Listing Import

The tool allows for direct import of FSBO listings into the agent's CRM, saving valuable time and streamlining the process of managing potential leads.

One-Click Open House Events

Z Lister simplifies the creation of Open House Facebook events, allowing agents to promote their listings quickly and efficiently.

User-Friendly Interface

Designed with simplicity in mind, Z Lister is accessible even to those without extensive technical knowledge, making it easy for all real estate agents to leverage its features.

Flexible Pricing Plans

Z Lister offers a range of pricing options to accommodate different needs and budgets, from individual agents to larger teams.

FAQ

Is Z Lister suitable for all real estate agents?

Z Lister is designed to be user-friendly and beneficial for real estate agents at all levels of technical expertise. Its features can help both individual agents and teams improve their online presence and streamline their workflow.

What are the main benefits of using Z Lister?

The main benefits include:

  1. Increased online visibility through Facebook Marketplace integration
  2. Enhanced credibility by showcasing Zillow reviews on personal websites
  3. Time-saving FSBO listing imports into CRM systems
  4. Efficient creation of Open House Facebook events

Does Z Lister offer a free plan?

Yes, Z Lister provides a free plan along with paid options for solo agents and teams, allowing users to choose the plan that best fits their needs and budget.

How can Z Lister help in attracting more leads?

Z Lister helps attract more leads by:

  • Expanding reach through Facebook Marketplace listings
  • Building trust with potential clients by displaying Zillow reviews
  • Streamlining the process of managing FSBO listings
  • Facilitating easy promotion of Open House events on Facebook

Latest Traffic Insights

  • Monthly Visits

    290.25 M

  • Bounce Rate

    55.49%

  • Pages Per Visit

    2.84

  • Time on Site(s)

    113.64

  • Global Rank

    -

  • Country Rank

    -

Recent Visits

Traffic Sources

  • Social Media:
    0.68%
  • Paid Referrals:
    0.54%
  • Email:
    0.11%
  • Referrals:
    14.58%
  • Search Engines:
    15.20%
  • Direct:
    68.89%
More Data

Related Websites

Enterprise Bot: AI Chatbot For Website | EntBot.ai

EntBot.ai can build an AI chatbot for your website in just 5 minutes, no technical skills required. You can easily embed it on your website, resulting in a 100% increase in customer response speed.

0
FlowTunes - Music for Focus

FlowTunes - Enhance your focus with curated music playlists designed to boost your productivity.

15.16 K
Get ChatGPT for Free with Google

You can now access ChatGPT, a powerful language model, for free with Google. Here's how:

Method 1: Google Colab

* Open Google Colab ([colab.research.google.com](http://colab.research.google.com))
* Create a new notebook
* Install the `transformers` library by running `!pip install transformers`
* Import the `transformers` library and load the ChatGPT model using `from transformers import AutoModelForCausalLM, AutoTokenizer; model = AutoModelForCausalLM.from_pretrained('chatgpt'); tokenizer = AutoTokenizer.from_pretrained('chatgpt')`
* Use the model to generate text using `input_text = "Your input here"; inputs = tokenizer.encode_plus(input_text, return_tensors='pt', max_length=1024, padding='max_length', truncation=True); output = model(inputs['input_ids'], attention_mask=inputs['attention_mask']); print(tokenizer.decode(output.logits[0], skip_special_tokens=True))`

Method 2: Google Apps Script

* Open Google Apps Script ([script.google.com](http://script.google.com))
* Create a new project
* Install the `transformers` library by running `npm install transformers`
* Import the `transformers` library and load the ChatGPT model using `const { AutoModelForCausalLM, AutoTokenizer } = require('transformers'); const model = new AutoModelForCausalLM('chatgpt'); const tokenizer = new AutoTokenizer('chatgpt');`
* Use the model to generate text using `const inputText = "Your input here"; const inputs = tokenizer.encodePlus(inputText, { return_tensors: 'pt', max_length: 1024, padding: 'max_length', truncation: true }); const output = model(inputs.inputIds, inputs.attentionMask); console.log(tokenizer.decode(output.logits[0], { skipSpecialTokens: true }));`

Note: These methods require some technical knowledge and may have limitations compared to the original ChatGPT model.

Get ChatGPT for Free with Google You can now access ChatGPT, a powerful language model, for free with Google. Here's how: Method 1: Google Colab * Open Google Colab ([colab.research.google.com](http://colab.research.google.com)) * Create a new notebook * Install the `transformers` library by running `!pip install transformers` * Import the `transformers` library and load the ChatGPT model using `from transformers import AutoModelForCausalLM, AutoTokenizer; model = AutoModelForCausalLM.from_pretrained('chatgpt'); tokenizer = AutoTokenizer.from_pretrained('chatgpt')` * Use the model to generate text using `input_text = "Your input here"; inputs = tokenizer.encode_plus(input_text, return_tensors='pt', max_length=1024, padding='max_length', truncation=True); output = model(inputs['input_ids'], attention_mask=inputs['attention_mask']); print(tokenizer.decode(output.logits[0], skip_special_tokens=True))` Method 2: Google Apps Script * Open Google Apps Script ([script.google.com](http://script.google.com)) * Create a new project * Install the `transformers` library by running `npm install transformers` * Import the `transformers` library and load the ChatGPT model using `const { AutoModelForCausalLM, AutoTokenizer } = require('transformers'); const model = new AutoModelForCausalLM('chatgpt'); const tokenizer = new AutoTokenizer('chatgpt');` * Use the model to generate text using `const inputText = "Your input here"; const inputs = tokenizer.encodePlus(inputText, { return_tensors: 'pt', max_length: 1024, padding: 'max_length', truncation: true }); const output = model(inputs.inputIds, inputs.attentionMask); console.log(tokenizer.decode(output.logits[0], { skipSpecialTokens: true }));` Note: These methods require some technical knowledge and may have limitations compared to the original ChatGPT model.

Get ChatGPT for Free with Google You can now access ChatGPT, a powerful language model, for free with Google. Here's how: Method 1: Google Colab * Open Google Colab ([colab.research.google.com](http://colab.research.google.com)) * Create a new notebook * Install the `transformers` library by running `!pip install transformers` * Import the `transformers` library and load the ChatGPT model using `from transformers import AutoModelForCausalLM, AutoTokenizer; model = AutoModelForCausalLM.from_pretrained('chatgpt'); tokenizer = AutoTokenizer.from_pretrained('chatgpt')` * Use the model to generate text using `input_text = "Your input here"; inputs = tokenizer.encode_plus(input_text, return_tensors='pt', max_length=1024, padding='max_length', truncation=True); output = model(inputs['input_ids'], attention_mask=inputs['attention_mask']); print(tokenizer.decode(output.logits[0], skip_special_tokens=True))` Method 2: Google Apps Script * Open Google Apps Script ([script.google.com](http://script.google.com)) * Create a new project * Install the `transformers` library by running `npm install transformers` * Import the `transformers` library and load the ChatGPT model using `const { AutoModelForCausalLM, AutoTokenizer } = require('transformers'); const model = new AutoModelForCausalLM('chatgpt'); const tokenizer = new AutoTokenizer('chatgpt');` * Use the model to generate text using `const inputText = "Your input here"; const inputs = tokenizer.encodePlus(inputText, { return_tensors: 'pt', max_length: 1024, padding: 'max_length', truncation: true }); const output = model(inputs.inputIds, inputs.attentionMask); console.log(tokenizer.decode(output.logits[0], { skipSpecialTokens: true }));` Note: These methods require some technical knowledge and may have limitations compared to the original ChatGPT model.

How to Add ChatGPT to All Google Searches ===================================================== Step 1: Create a Custom Search Engine -------------------------------------- * Go to the [Google Custom Search Engine](https://cse.google.com/) website and sign in with your Google account. * Click on the "New Search Engine" button. * Fill in the required information, such as the name and description of your search engine. * Click on the "Create" button. Step 2: Add ChatGPT to the Search Engine ----------------------------------------- * In the "Setup" tab, click on the "Add" button next to "Sites to search". * Enter the following URL: `https://chat.openai.com/` * Click on the "Add" button. Step 3: Configure the Search Engine -------------------------------------- * In the "Setup" tab, click on the "Edit" button next to "Search engine keywords". * Add the following keywords: `ChatGPT` * Click on the "Save" button. Step 4: Get the Search Engine Code ------------------------------------- * In the "Setup" tab, click on the "Get code" button. * Copy the HTML code provided. Step 5: Add the Search Engine to Your Browser ------------------------------------------------ * Open your browser and go to the "Settings" or "Options" page. * Look for the "Search engine" or "Default search engine" option. * Click on the "Add" or "Manage search engines" button. * Paste the HTML code you copied earlier. * Click on the "Add" or "Save" button. You're Done! =============== Now, whenever you search on Google, ChatGPT will be included in the search results. You can also use the custom search engine URL provided by Google to search directly.

290.25 M
Bing Search Engine

Use the Bing Search Engine to make your searches even better, powered by GPT-4!

290.25 M
ChatGPT to Markdown Plus

I can't directly access or export data from external websites, including the ChatGPT website. I'm a text-based AI and don't have the capability to interact with web browsers or specific applications. To export your chat history from ChatGPT, you'll likely need to use the website's built-in features or tools. Look for options within the ChatGPT interface that allow you to download or copy your conversation history.

290.25 M
Hashtag Guru: AI Assistant for Instagram on the App Store

Your Ultimate AI-Powered Hashtag and Caption Generator! Unlock the secret to social media success with Hashtag Guru, the ultimate AI-driven hashtag generator and caption creator that helps you increase your online visibility, boost engagement, and grow your followers!

120.34 M
Biolytics

All your lab tests in one place.

0