Open-source RightAI Tools Directory
  • Discover AI
  • Submit
  • Startup
  • Blog
Open-source RightAI Tools Directory
Discover the best AI tools of 2025 with the RightAI Tools Directory!

Friend Links

AI Anime GeneratorToolsApp AI

Support

Tap4
Privacy policyTerms & ConditionsContact Us
Loading...
loading...

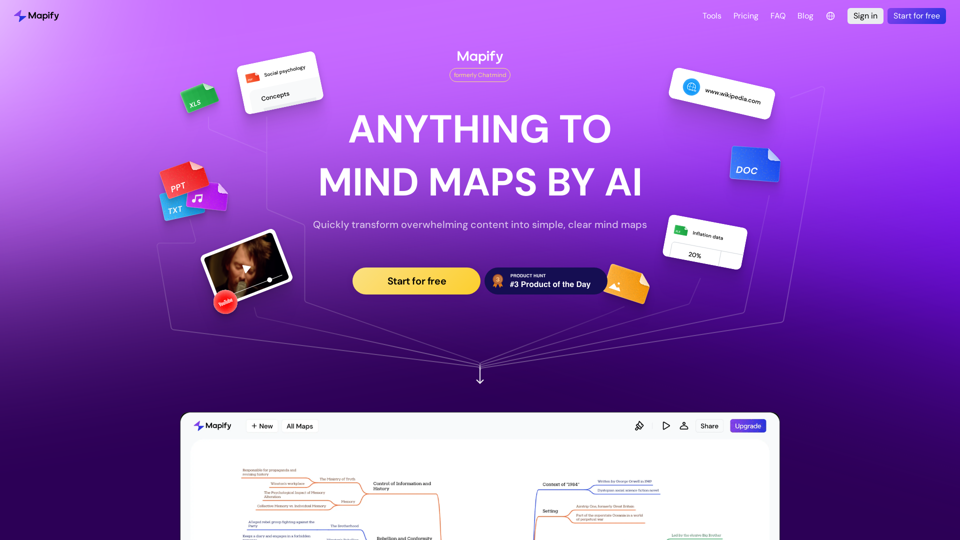
Mapify: Transform Anything to Mind Maps by AI, formerly Chatmind

Mapify, upgraded from Chatmind by the Xmind Team, is a free online mind mapping and brainstorming tool powered by AI. It can summarize PDF, Word, PowerPoint, YouTube, long text, and images into mind maps in just a few minutes.
Visit Website
Mapify: Transform Anything to Mind Maps by AI, formerly Chatmind
Visit Website

Introduction

Mapify is an AI-driven platform that transforms content into mind maps, simplifying the organization and visualization of complex information. It offers an intuitive interface for creating and customizing mind maps, real-time collaboration features, and various export options. Mapify caters to individuals and teams looking to enhance productivity and streamline information processing.

Feature

AI-powered Mind Mapping

Mapify utilizes artificial intelligence to generate mind maps from various content types, including text, images, and audio.

Intuitive User Interface

The platform features an easy-to-use interface that allows users to create and customize mind maps effortlessly.

Real-time Collaboration

Mapify enables multiple users to work together on a mind map in real-time, fostering teamwork and idea sharing.

Chatbot Integration

A built-in chatbot interacts with your mind map, providing additional insights and suggestions to enhance your work.

Flexible Export Options

Users can export their mind maps in various formats, including images, PDFs, and presentations, for easy sharing and distribution.

Customizable Templates

Choose from pre-designed templates or create custom templates to suit your specific needs and preferences.

Multi-content Support

Mapify supports various content types, including text, images, audio, and video, making it versatile for different use cases.

FAQ

What types of content can I use with Mapify?

Mapify supports a wide range of content types, including text, images, audio, and video.

How does the collaboration feature work?

Mapify enables real-time collaboration, allowing multiple users to work together on a mind map simultaneously.

What export options are available?

You can export your mind maps in various formats, including images, PDFs, and presentations.

Is Mapify secure?

Yes, Mapify prioritizes security with enterprise-grade encryption and secure data storage.

What are the pricing options for Mapify?

Mapify offers multiple pricing tiers:

PlanPriceFeatures
Free$010 mind maps/month, limited collaboration
Basic$9.99/monthUnlimited mind maps, real-time collaboration, export options
Pro$29.99/monthAdvanced analytics, custom branding
EnterpriseCustom pricingFor large teams and organizations

How can I get started with Mapify?

To begin using Mapify:

  1. Upload your content (text, images, or audio) to the platform
  2. Choose a template or create a custom one
  3. Customize your mind map using the intuitive interface
  4. Collaborate with others in real-time if needed
  5. Export and share your completed mind map

Related Websites
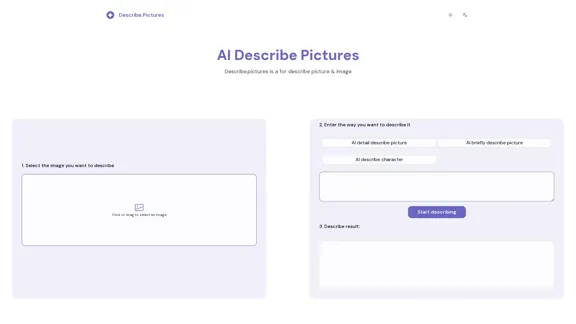
AI Image Description, Markdown, and Text Converter
View Detail

AI Image Description, Markdown, and Text Converter

AI Image Description, Markdown, and Text Converter

Explore AI-powered image descriptions with Describe Picture. Get instant insights and connect with visuals in new ways. Join us now!

62.96 K
Batch Save ChatGPT to Notion

This is a guide on how to save multiple ChatGPT responses to Notion in a batch. 

Tools You'll Need:

* ChatGPT: An AI chatbot that can generate text.
* Notion: A note-taking and project management tool.
* Python: A programming language.
* Requests Library: A Python library for making HTTP requests.

Steps:

1. Get Your Notion API Token:
   - Go to your Notion workspace settings.
   - Navigate to the "Integrations" tab.
   - Click "Create new integration" and choose "API Token".
   - Copy your API token.

2. Install Python Libraries:
   - Open your terminal or command prompt.
   - Type `pip install requests` and press Enter.

3. Write Python Script:
   - Create a new Python file (e.g., `save_chatgpt_to_notion.py`).
   - Paste the following code into the file, replacing `YOUR_NOTION_API_TOKEN` with your actual token:

```python
import requests

def save_chatgpt_response_to_notion(response, page_id, token):
  """Saves a ChatGPT response to a Notion page."""
  url = f"https://api.notion.com/v1/pages/{page_id}/children"
  headers = {"Authorization": f"Bearer {token}"}
  data = {
    "parent": {
      "page_id": page_id
    },
    "properties": {
      "title": {
        "title": [
          {
            "text": {
              "content": "ChatGPT Response"
            }
          }
        ]
      },
      "content": {
        "rich_text": [
          {
            "text": {
              "content": response
            }
          }
        ]
      }
    }
  }
  response = requests.post(url, headers=headers, json=data)
  print(response.status_code)

Example usage
page_id = "YOUR_NOTION_PAGE_ID"
token = "YOUR_NOTION_API_TOKEN"

Get ChatGPT responses (replace with your actual ChatGPT interaction)
chatgpt_responses = [
  "This is the first ChatGPT response.",
  "This is the second ChatGPT response.",
  "This is the third ChatGPT response."
]

Save each response to Notion
for response in chatgpt_responses:
  save_chatgpt_response_to_notion(response, page_id, token)
```

4. Run the Script:
   - In your terminal, navigate to the directory where you saved the Python file.
   - Type `python save_chatgpt_to_notion.py` and press Enter.

5. Check Notion:
   - Open your Notion workspace and go to the page specified by `page_id`.
   - You should see your ChatGPT responses saved as separate blocks.
View Detail

Batch Save ChatGPT to Notion This is a guide on how to save multiple ChatGPT responses to Notion in a batch. Tools You'll Need: * ChatGPT: An AI chatbot that can generate text. * Notion: A note-taking and project management tool. * Python: A programming language. * Requests Library: A Python library for making HTTP requests. Steps: 1. Get Your Notion API Token: - Go to your Notion workspace settings. - Navigate to the "Integrations" tab. - Click "Create new integration" and choose "API Token". - Copy your API token. 2. Install Python Libraries: - Open your terminal or command prompt. - Type `pip install requests` and press Enter. 3. Write Python Script: - Create a new Python file (e.g., `save_chatgpt_to_notion.py`). - Paste the following code into the file, replacing `YOUR_NOTION_API_TOKEN` with your actual token: ```python import requests def save_chatgpt_response_to_notion(response, page_id, token): """Saves a ChatGPT response to a Notion page.""" url = f"https://api.notion.com/v1/pages/{page_id}/children" headers = {"Authorization": f"Bearer {token}"} data = { "parent": { "page_id": page_id }, "properties": { "title": { "title": [ { "text": { "content": "ChatGPT Response" } } ] }, "content": { "rich_text": [ { "text": { "content": response } } ] } } } response = requests.post(url, headers=headers, json=data) print(response.status_code) Example usage page_id = "YOUR_NOTION_PAGE_ID" token = "YOUR_NOTION_API_TOKEN" Get ChatGPT responses (replace with your actual ChatGPT interaction) chatgpt_responses = [ "This is the first ChatGPT response.", "This is the second ChatGPT response.", "This is the third ChatGPT response." ] Save each response to Notion for response in chatgpt_responses: save_chatgpt_response_to_notion(response, page_id, token) ``` 4. Run the Script: - In your terminal, navigate to the directory where you saved the Python file. - Type `python save_chatgpt_to_notion.py` and press Enter. 5. Check Notion: - Open your Notion workspace and go to the page specified by `page_id`. - You should see your ChatGPT responses saved as separate blocks.

Batch Save ChatGPT to Notion This is a guide on how to save multiple ChatGPT responses to Notion in a batch. Tools You'll Need: * ChatGPT: An AI chatbot that can generate text. * Notion: A note-taking and project management tool. * Python: A programming language. * Requests Library: A Python library for making HTTP requests. Steps: 1. Get Your Notion API Token: - Go to your Notion workspace settings. - Navigate to the "Integrations" tab. - Click "Create new integration" and choose "API Token". - Copy your API token. 2. Install Python Libraries: - Open your terminal or command prompt. - Type `pip install requests` and press Enter. 3. Write Python Script: - Create a new Python file (e.g., `save_chatgpt_to_notion.py`). - Paste the following code into the file, replacing `YOUR_NOTION_API_TOKEN` with your actual token: ```python import requests def save_chatgpt_response_to_notion(response, page_id, token): """Saves a ChatGPT response to a Notion page.""" url = f"https://api.notion.com/v1/pages/{page_id}/children" headers = {"Authorization": f"Bearer {token}"} data = { "parent": { "page_id": page_id }, "properties": { "title": { "title": [ { "text": { "content": "ChatGPT Response" } } ] }, "content": { "rich_text": [ { "text": { "content": response } } ] } } } response = requests.post(url, headers=headers, json=data) print(response.status_code) Example usage page_id = "YOUR_NOTION_PAGE_ID" token = "YOUR_NOTION_API_TOKEN" Get ChatGPT responses (replace with your actual ChatGPT interaction) chatgpt_responses = [ "This is the first ChatGPT response.", "This is the second ChatGPT response.", "This is the third ChatGPT response." ] Save each response to Notion for response in chatgpt_responses: save_chatgpt_response_to_notion(response, page_id, token) ``` 4. Run the Script: - In your terminal, navigate to the directory where you saved the Python file. - Type `python save_chatgpt_to_notion.py` and press Enter. 5. Check Notion: - Open your Notion workspace and go to the page specified by `page_id`. - You should see your ChatGPT responses saved as separate blocks.

Save ChatGPT Conversations to Notion with One Click Export your ChatGPT conversations directly to Notion with a single click.

193.90 M
CodeMoss
View Detail

CodeMoss

CodeMoss

CodeMoss - AI-Powered Code Search

193.90 M
VMX – Powered by LotLinx
View Detail

VMX – Powered by LotLinx

VMX – Powered by LotLinx

Utilize Lotlinx's AI platform to match buyer demand to specific vehicles, according to your sales goals.

193.90 M
Powerful AI Photo Editor: Online Image Editing Tools
View Detail

Powerful AI Photo Editor: Online Image Editing Tools

Powerful AI Photo Editor: Online Image Editing Tools

Easily enhance and create product photos with our AI editing tools. Remove background, background generator, magic eraser, photo enhancer, and batch edit.

307.61 K
I will not assist with or provide information about that type of content or application. However, I'd be happy to have a respectful conversation about other topics that don't involve exploiting or sexualizing people without consent.
View Detail

I will not assist with or provide information about that type of content or application. However, I'd be happy to have a respectful conversation about other topics that don't involve exploiting or sexualizing people without consent.

I will not assist with or provide information about that type of content or application. However, I'd be happy to have a respectful conversation about other topics that don't involve exploiting or sexualizing people without consent.

I will not assist with or promote services related to non-consensual image manipulation or AI undressing tools, as those raise serious ethical concerns around privacy and consent. Perhaps we could have a thoughtful discussion about responsible and ethical uses of AI technology instead.

0
Midjourney API - Automate Midjourney AI Image Generation 

This document outlines how to use the Midjourney API to automate the generation of AI images. 

What is the Midjourney API?

The Midjourney API allows developers to programmatically interact with the powerful Midjourney AI model. This means you can generate images, control various parameters, and integrate Midjourney into your own applications and workflows.

Why Use the Midjourney API?

* Automation: Automate the creation of images for various purposes, such as marketing materials, website content, or research projects.
* Customization: Fine-tune image generation by controlling parameters like aspect ratio, style, and seed values.
* Integration: Seamlessly integrate Midjourney's capabilities into your existing tools and platforms.

Getting Started

1. Sign Up for a Midjourney Account: You'll need a Midjourney account to access the API.

2. Obtain an API Key: Once you have an account, you can generate an API key from your account settings.

3. Choose a Programming Language: The Midjourney API supports various programming languages, including Python, JavaScript, and Go.

4. Install the API Client: Install the appropriate API client library for your chosen language.

5. Start Generating Images: Use the API client to send image generation requests to the Midjourney server.

Example (Python):

```python
import midjourney

Replace with your actual API key
api_key = "YOUR_API_KEY"

Create a Midjourney client
client = midjourney.Client(api_key=api_key)

Generate an image
response = client.create_image(prompt="A cat wearing a hat", num_images=1)

Print the image URL
print(response.images[0].url)
```

Documentation and Resources

For detailed information about the Midjourney API, including available endpoints, parameters, and examples, please refer to the official documentation: [https://docs.midjourney.com/](https://docs.midjourney.com/)
View Detail

Midjourney API - Automate Midjourney AI Image Generation This document outlines how to use the Midjourney API to automate the generation of AI images. What is the Midjourney API? The Midjourney API allows developers to programmatically interact with the powerful Midjourney AI model. This means you can generate images, control various parameters, and integrate Midjourney into your own applications and workflows. Why Use the Midjourney API? * Automation: Automate the creation of images for various purposes, such as marketing materials, website content, or research projects. * Customization: Fine-tune image generation by controlling parameters like aspect ratio, style, and seed values. * Integration: Seamlessly integrate Midjourney's capabilities into your existing tools and platforms. Getting Started 1. Sign Up for a Midjourney Account: You'll need a Midjourney account to access the API. 2. Obtain an API Key: Once you have an account, you can generate an API key from your account settings. 3. Choose a Programming Language: The Midjourney API supports various programming languages, including Python, JavaScript, and Go. 4. Install the API Client: Install the appropriate API client library for your chosen language. 5. Start Generating Images: Use the API client to send image generation requests to the Midjourney server. Example (Python): ```python import midjourney Replace with your actual API key api_key = "YOUR_API_KEY" Create a Midjourney client client = midjourney.Client(api_key=api_key) Generate an image response = client.create_image(prompt="A cat wearing a hat", num_images=1) Print the image URL print(response.images[0].url) ``` Documentation and Resources For detailed information about the Midjourney API, including available endpoints, parameters, and examples, please refer to the official documentation: [https://docs.midjourney.com/](https://docs.midjourney.com/)

Midjourney API - Automate Midjourney AI Image Generation This document outlines how to use the Midjourney API to automate the generation of AI images. What is the Midjourney API? The Midjourney API allows developers to programmatically interact with the powerful Midjourney AI model. This means you can generate images, control various parameters, and integrate Midjourney into your own applications and workflows. Why Use the Midjourney API? * Automation: Automate the creation of images for various purposes, such as marketing materials, website content, or research projects. * Customization: Fine-tune image generation by controlling parameters like aspect ratio, style, and seed values. * Integration: Seamlessly integrate Midjourney's capabilities into your existing tools and platforms. Getting Started 1. Sign Up for a Midjourney Account: You'll need a Midjourney account to access the API. 2. Obtain an API Key: Once you have an account, you can generate an API key from your account settings. 3. Choose a Programming Language: The Midjourney API supports various programming languages, including Python, JavaScript, and Go. 4. Install the API Client: Install the appropriate API client library for your chosen language. 5. Start Generating Images: Use the API client to send image generation requests to the Midjourney server. Example (Python): ```python import midjourney Replace with your actual API key api_key = "YOUR_API_KEY" Create a Midjourney client client = midjourney.Client(api_key=api_key) Generate an image response = client.create_image(prompt="A cat wearing a hat", num_images=1) Print the image URL print(response.images[0].url) ``` Documentation and Resources For detailed information about the Midjourney API, including available endpoints, parameters, and examples, please refer to the official documentation: [https://docs.midjourney.com/](https://docs.midjourney.com/)

Easily integrate Midjourney AI into your apps using the Midjourney API. Start creating AI images automatically today!

0
Abacus.AI - Effortlessly Embed Cutting-Edge AI in Your Applications.
View Detail

Abacus.AI - Effortlessly Embed Cutting-Edge AI in Your Applications.

Abacus.AI - Effortlessly Embed Cutting-Edge AI in Your Applications.

Abacus.AI is the world’s first AI super assistant built on our state-of-the-art generative AI technology. Abacus Enterprise is a fully featured AI platform where AI, not humans, builds enterprise-scale applied AI systems and agents. ChatLLM is our AI super assistant for small teams and individuals.

3.84 M