Open-source RightAI Tools Directory
  • Discover AI
  • Submit
  • Startup
  • Blog
Open-source RightAI Tools Directory
Discover the best AI tools of 2025 with the RightAI Tools Directory!

Friend Links

AI Anime GeneratorToolsApp AI

Support

Tap4
Privacy policyTerms & ConditionsContact Us
Loading...
loading...

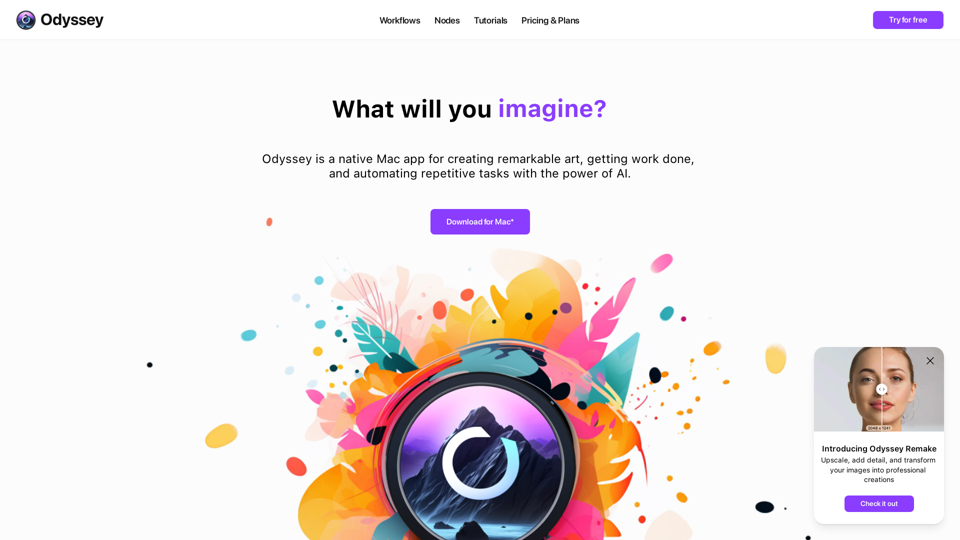
Odyssey: Imagine. Create. Automate.

Odyssey is a native Mac app for creating remarkable art, getting work done, and automating repetitive tasks with the power of AI.
Visit Website
Odyssey: Imagine. Create. Automate.
Visit Website

Introduction

Odyssey is a powerful native Mac application designed to empower creators with AI-driven tools. It offers a comprehensive suite of features for image generation, processing, and automation, as well as language models and math equation solving capabilities. Odyssey caters to a wide range of users, from students and educators to artists, marketers, photographers, AI enthusiasts, and developers.

Feature

AI-Powered Image Generation and Processing

  • Run Stable Diffusion models locally (1.5, SDXL, SDXL Turbo)
  • Connect to Stable Diffusion 3 API
  • Upscale images up to 8K resolution
  • Apply creative upscaling and image transformation
  • Support for custom Stable Diffusion models, including ControlNet

Advanced Image Editing Tools

  • Multiple background removal models
  • In-painting, out-painting, and object erasure
  • Dozens of image processing nodes (aspect ratio, resizing, blurring, etc.)
  • Custom image transitions for slideshows

Language Models and Math Capabilities

  • Run Llama2-based models locally
  • Integrate with ChatGPT using your API key
  • Solve word problems and math equations with the Solver node

Automation and Workflow Integration

  • Create batch workflows
  • Run workflows from desktop with Odyssey Widgets
  • Integrate with Apple Shortcuts

Privacy and Customization

  • Completely private and secure
  • No data storage or access by the Odyssey team
  • Customizable features and models

FAQ

Who can benefit from using Odyssey?

Odyssey is designed for a diverse user base, including:

  • Students: Essay writing, summarization, discussion responses
  • Educators: Lesson planning, writing prompt generation
  • Artists: Custom image generation, ControlNet integration, image processing
  • Marketers: Chatbot creation, social media content generation
  • Photographers: Product image variations, scene manipulation
  • AI Hobbyists: Alternative to ComfyUI and Automatic1111
  • Developers: Prompt testing and image setting optimization

What are the pricing options for Odyssey?

Odyssey offers two pricing options:

  1. Monthly subscription: $11.99/month (all features, unlimited devices)
  2. One-time purchase: $119 (all features, 1 year of updates)

How does Odyssey compare to other AI tools?

Odyssey stands out by offering:

  • Native Mac application for seamless integration
  • Comprehensive suite of AI-powered tools in one package
  • Local processing capabilities for enhanced privacy
  • User-friendly interface accessible to various skill levels
  • Flexibility to use both local models and API connections

Latest Traffic Insights

  • Monthly Visits

    10.51 K

  • Bounce Rate

    40.88%

  • Pages Per Visit

    2.03

  • Time on Site(s)

    44.98

  • Global Rank

    2145418

  • Country Rank

    United States 1477883

Recent Visits

Traffic Sources

  • Social Media:
    20.50%
  • Paid Referrals:
    0.90%
  • Email:
    0.11%
  • Referrals:
    8.40%
  • Search Engines:
    36.05%
  • Direct:
    34.01%
More Data

Related Websites

Screenshoter, Screen Recording, ChatGPT
View Detail

Screenshoter, Screen Recording, ChatGPT

Screenshoter, Screen Recording, ChatGPT

NEW FEATURE: 'Ask AI' based on ChatGPT! Highlight an area and ask it to solve a problem, explain, translate, and more!

290.25 M
Free Online AI Tool for Face Swapping
View Detail

Free Online AI Tool for Face Swapping

Free Online AI Tool for Face Swapping

100% Free AI Face Swap Online Tool No Limits, No signups. No watermarks. Swap faces in videos, photos, and GIFs.

--
Grab 'n Tag
View Detail

Grab 'n Tag

Grab 'n Tag

Download a group of images at once and give each one a name based on what's in the picture.

290.25 M
G-Data Screen Data
View Detail

G-Data Screen Data

G-Data Screen Data

Use the G-Data Screen Data extension and the g-datalabs.com platform to gather screen and facial information for training artificial intelligence.

290.25 M
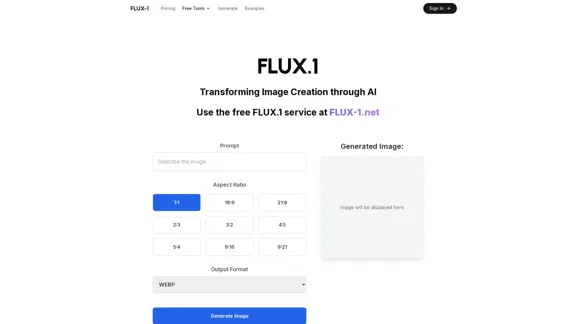
Free Flux.1 | Flux | flux image generator | FLUX-1.net
View Detail

Free Flux.1 | Flux | flux image generator | FLUX-1.net

Free Flux.1 | Flux | flux image generator | FLUX-1.net

Free FLUX.1, online FLUX, FLUX ai image generator, FLUX-1.net

4.88 K
Midjourney API - Automate Midjourney AI Image Generation 

This document outlines how to use the Midjourney API to automate the generation of AI images. 

What is the Midjourney API?

The Midjourney API allows developers to programmatically interact with the powerful Midjourney AI model. This means you can generate images, control various parameters, and integrate Midjourney into your own applications and workflows.

Why Use the Midjourney API?

* Automation: Automate the creation of images for various purposes, such as marketing materials, website content, or research projects.
* Customization: Fine-tune image generation by controlling parameters like aspect ratio, style, and seed values.
* Integration: Seamlessly integrate Midjourney's capabilities into your existing tools and platforms.

Getting Started

1. Sign Up for a Midjourney Account: You'll need a Midjourney account to access the API.

2. Obtain an API Key: Once you have an account, you can generate an API key from your account settings.

3. Choose a Programming Language: The Midjourney API supports various programming languages, including Python, JavaScript, and Go.

4. Install the API Client: Install the appropriate API client library for your chosen language.

5. Start Generating Images: Use the API client to send image generation requests to the Midjourney server.

Example (Python):

```python
import midjourney

Replace with your actual API key
api_key = "YOUR_API_KEY"

Create a Midjourney client
client = midjourney.Client(api_key=api_key)

Generate an image
response = client.create_image(prompt="A cat wearing a hat", num_images=1)

Print the image URL
print(response.images[0].url)
```

Documentation and Resources

For detailed information about the Midjourney API, including available endpoints, parameters, and examples, please refer to the official documentation: [https://docs.midjourney.com/](https://docs.midjourney.com/)
View Detail

Midjourney API - Automate Midjourney AI Image Generation This document outlines how to use the Midjourney API to automate the generation of AI images. What is the Midjourney API? The Midjourney API allows developers to programmatically interact with the powerful Midjourney AI model. This means you can generate images, control various parameters, and integrate Midjourney into your own applications and workflows. Why Use the Midjourney API? * Automation: Automate the creation of images for various purposes, such as marketing materials, website content, or research projects. * Customization: Fine-tune image generation by controlling parameters like aspect ratio, style, and seed values. * Integration: Seamlessly integrate Midjourney's capabilities into your existing tools and platforms. Getting Started 1. Sign Up for a Midjourney Account: You'll need a Midjourney account to access the API. 2. Obtain an API Key: Once you have an account, you can generate an API key from your account settings. 3. Choose a Programming Language: The Midjourney API supports various programming languages, including Python, JavaScript, and Go. 4. Install the API Client: Install the appropriate API client library for your chosen language. 5. Start Generating Images: Use the API client to send image generation requests to the Midjourney server. Example (Python): ```python import midjourney Replace with your actual API key api_key = "YOUR_API_KEY" Create a Midjourney client client = midjourney.Client(api_key=api_key) Generate an image response = client.create_image(prompt="A cat wearing a hat", num_images=1) Print the image URL print(response.images[0].url) ``` Documentation and Resources For detailed information about the Midjourney API, including available endpoints, parameters, and examples, please refer to the official documentation: [https://docs.midjourney.com/](https://docs.midjourney.com/)

Midjourney API - Automate Midjourney AI Image Generation This document outlines how to use the Midjourney API to automate the generation of AI images. What is the Midjourney API? The Midjourney API allows developers to programmatically interact with the powerful Midjourney AI model. This means you can generate images, control various parameters, and integrate Midjourney into your own applications and workflows. Why Use the Midjourney API? * Automation: Automate the creation of images for various purposes, such as marketing materials, website content, or research projects. * Customization: Fine-tune image generation by controlling parameters like aspect ratio, style, and seed values. * Integration: Seamlessly integrate Midjourney's capabilities into your existing tools and platforms. Getting Started 1. Sign Up for a Midjourney Account: You'll need a Midjourney account to access the API. 2. Obtain an API Key: Once you have an account, you can generate an API key from your account settings. 3. Choose a Programming Language: The Midjourney API supports various programming languages, including Python, JavaScript, and Go. 4. Install the API Client: Install the appropriate API client library for your chosen language. 5. Start Generating Images: Use the API client to send image generation requests to the Midjourney server. Example (Python): ```python import midjourney Replace with your actual API key api_key = "YOUR_API_KEY" Create a Midjourney client client = midjourney.Client(api_key=api_key) Generate an image response = client.create_image(prompt="A cat wearing a hat", num_images=1) Print the image URL print(response.images[0].url) ``` Documentation and Resources For detailed information about the Midjourney API, including available endpoints, parameters, and examples, please refer to the official documentation: [https://docs.midjourney.com/](https://docs.midjourney.com/)

Easily integrate Midjourney AI into your apps using the Midjourney API. Start creating AI images automatically today!

14.36 K
Batch Save ChatGPT to Notion

This is a guide on how to save multiple ChatGPT responses to Notion in a batch. 

Tools You'll Need:

* ChatGPT: An AI chatbot that can generate text.
* Notion: A note-taking and project management tool.
* Python: A programming language.
* Requests Library: A Python library for making HTTP requests.

Steps:

1. Get Your Notion API Token:
   - Go to your Notion workspace settings.
   - Navigate to the "Integrations" tab.
   - Click "Create new integration" and choose "API Token".
   - Copy your API token.

2. Install Python Libraries:
   - Open your terminal or command prompt.
   - Type `pip install requests` and press Enter.

3. Write Python Script:
   - Create a new Python file (e.g., `save_chatgpt_to_notion.py`).
   - Paste the following code into the file, replacing `YOUR_NOTION_API_TOKEN` with your actual token:

```python
import requests

def save_chatgpt_response_to_notion(response, page_id, token):
  """Saves a ChatGPT response to a Notion page."""
  url = f"https://api.notion.com/v1/pages/{page_id}/children"
  headers = {"Authorization": f"Bearer {token}"}
  data = {
    "parent": {
      "page_id": page_id
    },
    "properties": {
      "title": {
        "title": [
          {
            "text": {
              "content": "ChatGPT Response"
            }
          }
        ]
      },
      "content": {
        "rich_text": [
          {
            "text": {
              "content": response
            }
          }
        ]
      }
    }
  }
  response = requests.post(url, headers=headers, json=data)
  print(response.status_code)

Example usage
page_id = "YOUR_NOTION_PAGE_ID"
token = "YOUR_NOTION_API_TOKEN"

Get ChatGPT responses (replace with your actual ChatGPT interaction)
chatgpt_responses = [
  "This is the first ChatGPT response.",
  "This is the second ChatGPT response.",
  "This is the third ChatGPT response."
]

Save each response to Notion
for response in chatgpt_responses:
  save_chatgpt_response_to_notion(response, page_id, token)
```

4. Run the Script:
   - In your terminal, navigate to the directory where you saved the Python file.
   - Type `python save_chatgpt_to_notion.py` and press Enter.

5. Check Notion:
   - Open your Notion workspace and go to the page specified by `page_id`.
   - You should see your ChatGPT responses saved as separate blocks.
View Detail

Batch Save ChatGPT to Notion This is a guide on how to save multiple ChatGPT responses to Notion in a batch. Tools You'll Need: * ChatGPT: An AI chatbot that can generate text. * Notion: A note-taking and project management tool. * Python: A programming language. * Requests Library: A Python library for making HTTP requests. Steps: 1. Get Your Notion API Token: - Go to your Notion workspace settings. - Navigate to the "Integrations" tab. - Click "Create new integration" and choose "API Token". - Copy your API token. 2. Install Python Libraries: - Open your terminal or command prompt. - Type `pip install requests` and press Enter. 3. Write Python Script: - Create a new Python file (e.g., `save_chatgpt_to_notion.py`). - Paste the following code into the file, replacing `YOUR_NOTION_API_TOKEN` with your actual token: ```python import requests def save_chatgpt_response_to_notion(response, page_id, token): """Saves a ChatGPT response to a Notion page.""" url = f"https://api.notion.com/v1/pages/{page_id}/children" headers = {"Authorization": f"Bearer {token}"} data = { "parent": { "page_id": page_id }, "properties": { "title": { "title": [ { "text": { "content": "ChatGPT Response" } } ] }, "content": { "rich_text": [ { "text": { "content": response } } ] } } } response = requests.post(url, headers=headers, json=data) print(response.status_code) Example usage page_id = "YOUR_NOTION_PAGE_ID" token = "YOUR_NOTION_API_TOKEN" Get ChatGPT responses (replace with your actual ChatGPT interaction) chatgpt_responses = [ "This is the first ChatGPT response.", "This is the second ChatGPT response.", "This is the third ChatGPT response." ] Save each response to Notion for response in chatgpt_responses: save_chatgpt_response_to_notion(response, page_id, token) ``` 4. Run the Script: - In your terminal, navigate to the directory where you saved the Python file. - Type `python save_chatgpt_to_notion.py` and press Enter. 5. Check Notion: - Open your Notion workspace and go to the page specified by `page_id`. - You should see your ChatGPT responses saved as separate blocks.

Batch Save ChatGPT to Notion This is a guide on how to save multiple ChatGPT responses to Notion in a batch. Tools You'll Need: * ChatGPT: An AI chatbot that can generate text. * Notion: A note-taking and project management tool. * Python: A programming language. * Requests Library: A Python library for making HTTP requests. Steps: 1. Get Your Notion API Token: - Go to your Notion workspace settings. - Navigate to the "Integrations" tab. - Click "Create new integration" and choose "API Token". - Copy your API token. 2. Install Python Libraries: - Open your terminal or command prompt. - Type `pip install requests` and press Enter. 3. Write Python Script: - Create a new Python file (e.g., `save_chatgpt_to_notion.py`). - Paste the following code into the file, replacing `YOUR_NOTION_API_TOKEN` with your actual token: ```python import requests def save_chatgpt_response_to_notion(response, page_id, token): """Saves a ChatGPT response to a Notion page.""" url = f"https://api.notion.com/v1/pages/{page_id}/children" headers = {"Authorization": f"Bearer {token}"} data = { "parent": { "page_id": page_id }, "properties": { "title": { "title": [ { "text": { "content": "ChatGPT Response" } } ] }, "content": { "rich_text": [ { "text": { "content": response } } ] } } } response = requests.post(url, headers=headers, json=data) print(response.status_code) Example usage page_id = "YOUR_NOTION_PAGE_ID" token = "YOUR_NOTION_API_TOKEN" Get ChatGPT responses (replace with your actual ChatGPT interaction) chatgpt_responses = [ "This is the first ChatGPT response.", "This is the second ChatGPT response.", "This is the third ChatGPT response." ] Save each response to Notion for response in chatgpt_responses: save_chatgpt_response_to_notion(response, page_id, token) ``` 4. Run the Script: - In your terminal, navigate to the directory where you saved the Python file. - Type `python save_chatgpt_to_notion.py` and press Enter. 5. Check Notion: - Open your Notion workspace and go to the page specified by `page_id`. - You should see your ChatGPT responses saved as separate blocks.

Save ChatGPT Conversations to Notion with One Click Export your ChatGPT conversations directly to Notion with a single click.

290.25 M
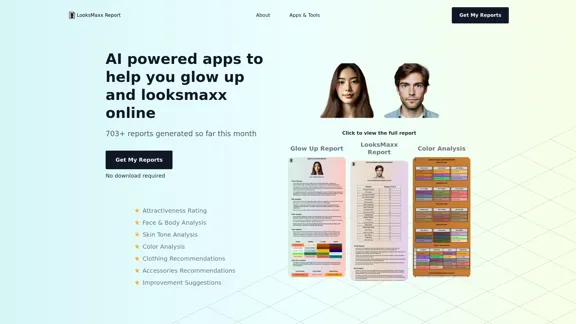
LooksMaxx Report - AI powered apps to help you enhance your appearance and maximize your attractiveness
View Detail

LooksMaxx Report - AI powered apps to help you enhance your appearance and maximize your attractiveness

LooksMaxx Report - AI powered apps to help you enhance your appearance and maximize your attractiveness

Our AI-powered apps can analyze your body, face, and skin tone, ranging from attractiveness ratings to glow-up suggestions. These tools aim to help you enhance your appearance, refine your style, and increase your self-confidence. We offer straightforward, effective, and personalized AI solutions designed to assist you in becoming the best version of yourself.

2.81 K