Open-source RightAI Tools Directory
  • Discover AI
  • Submit
  • Startup
  • Blog
Open-source RightAI Tools Directory
Discover the best AI tools of 2025 with the RightAI Tools Directory!

Friend Links

AI Anime GeneratorToolsApp AI

Support

Tap4
Privacy policyTerms & ConditionsContact Us
Loading...
loading...

meetXcc: AI Meeting Notes for Google Meet

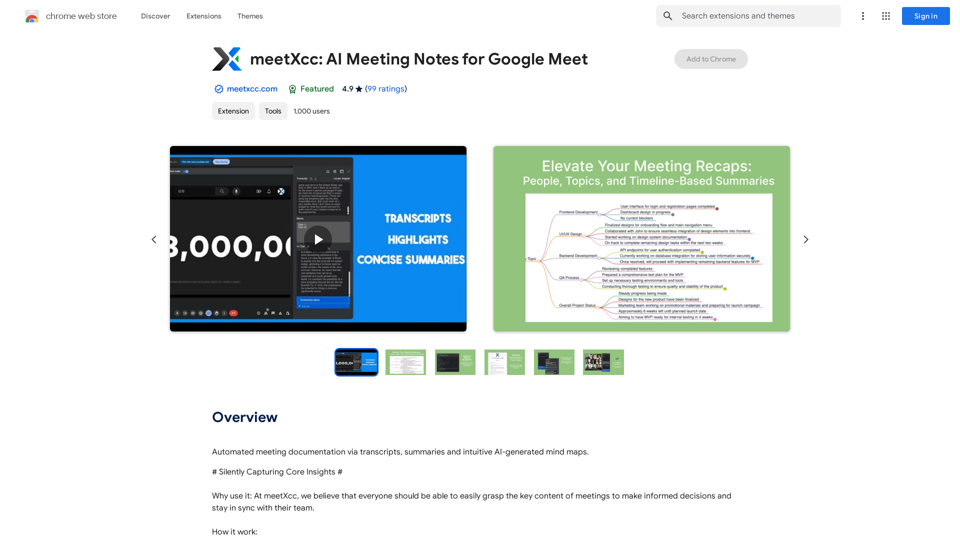
Automated meeting documentation via transcripts, summaries and intuitive AI-generated mind maps.
Visit Website
meetXcc: AI Meeting Notes for Google Meet
Visit Website

Introduction

meetXcc is a Chrome extension designed to enhance video conferencing experiences. It offers automatic transcription, intelligent summarization, and visualization features for Google Meet meetings. This tool helps users capture key content, share meeting records, and improve overall meeting efficiency across various professional fields.

Feature

Automatic Transcription

  • Real-time speech-to-text conversion during Google Meet meetings
  • Multi-speaker recognition and transcription
  • Instant meeting assistance with real-time summaries
  • Note-taking and key point highlighting during transcription

Intelligent Summarization and Visualization

  • AI-generated comprehensive meeting summaries within one minute
  • Multi-perspective summaries (people, topic, timeline)
  • Customizable summary length and detail
  • Mind map view for overall meeting structure

Easy Sharing and Collaboration

  • One-click export of meeting transcripts
  • Direct sharing to attendees' email addresses
  • Cloud storage and cross-device synchronization
  • Customizable sharing permissions

Versatile Professional Applications

meetXcc caters to various professions:

ProfessionUse Case
RecruitersRecord interview content
ExecutivesGrasp key points in workplace meetings
EngineersRecord technical details in project meetings
CounselorsDocument counseling sessions
Legal ProfessionalsAccurately record legal meeting content
TeachersRecord classroom content and interactions
PhysiciansDocument patient symptoms and medical records
Project ManagersRecord meeting resolutions and assignments
Sales ProfessionalsCapture customer needs and concerns
ResearchersDocument research discussions and progress

FAQ

How does meetXcc work?

meetXcc utilizes AI technology to provide automatic transcription, generate comprehensive meeting summaries, and offer real-time visualization features for Google Meet sessions.

What are the main benefits of using meetXcc?

meetXcc helps users master key meeting content, facilitates easy sharing of meeting records with team members, and significantly enhances the video conferencing experience through its advanced features.

Is meetXcc suitable for different professions?

Yes, meetXcc is designed to cater to a wide range of professionals, including recruiters, executives, engineers, counselors, legal professionals, teachers, physicians, project managers, sales professionals, and researchers.

How can I start using meetXcc?

To begin using meetXcc, simply install the Chrome extension and follow the provided prompts to set up your account. Once installed, you can start leveraging its features in your Google Meet sessions.

Latest Traffic Insights

  • Monthly Visits

    290.25 M

  • Bounce Rate

    55.49%

  • Pages Per Visit

    2.84

  • Time on Site(s)

    113.64

  • Global Rank

    -

  • Country Rank

    -

Recent Visits

Traffic Sources

  • Social Media:
    0.68%
  • Paid Referrals:
    0.54%
  • Email:
    0.11%
  • Referrals:
    14.58%
  • Search Engines:
    15.20%
  • Direct:
    68.89%
More Data

Related Websites

Image to SVG Converter
View Detail

Image to SVG Converter

Image to SVG Converter

Help me convert images to vector graphics (SVG).

290.25 M
VMX – Powered by LotLinx
View Detail

VMX – Powered by LotLinx

VMX – Powered by LotLinx

Utilize Lotlinx's AI platform to match buyer demand to specific vehicles, according to your sales goals.

290.25 M
Batch Save ChatGPT to Notion

This is a guide on how to save multiple ChatGPT responses to Notion in a batch. 

Tools You'll Need:

* ChatGPT: An AI chatbot that can generate text.
* Notion: A note-taking and project management tool.
* Python: A programming language.
* Requests Library: A Python library for making HTTP requests.

Steps:

1. Get Your Notion API Token:
   - Go to your Notion workspace settings.
   - Navigate to the "Integrations" tab.
   - Click "Create new integration" and choose "API Token".
   - Copy your API token.

2. Install Python Libraries:
   - Open your terminal or command prompt.
   - Type `pip install requests` and press Enter.

3. Write Python Script:
   - Create a new Python file (e.g., `save_chatgpt_to_notion.py`).
   - Paste the following code into the file, replacing `YOUR_NOTION_API_TOKEN` with your actual token:

```python
import requests

def save_chatgpt_response_to_notion(response, page_id, token):
  """Saves a ChatGPT response to a Notion page."""
  url = f"https://api.notion.com/v1/pages/{page_id}/children"
  headers = {"Authorization": f"Bearer {token}"}
  data = {
    "parent": {
      "page_id": page_id
    },
    "properties": {
      "title": {
        "title": [
          {
            "text": {
              "content": "ChatGPT Response"
            }
          }
        ]
      },
      "content": {
        "rich_text": [
          {
            "text": {
              "content": response
            }
          }
        ]
      }
    }
  }
  response = requests.post(url, headers=headers, json=data)
  print(response.status_code)

Example usage
page_id = "YOUR_NOTION_PAGE_ID"
token = "YOUR_NOTION_API_TOKEN"

Get ChatGPT responses (replace with your actual ChatGPT interaction)
chatgpt_responses = [
  "This is the first ChatGPT response.",
  "This is the second ChatGPT response.",
  "This is the third ChatGPT response."
]

Save each response to Notion
for response in chatgpt_responses:
  save_chatgpt_response_to_notion(response, page_id, token)
```

4. Run the Script:
   - In your terminal, navigate to the directory where you saved the Python file.
   - Type `python save_chatgpt_to_notion.py` and press Enter.

5. Check Notion:
   - Open your Notion workspace and go to the page specified by `page_id`.
   - You should see your ChatGPT responses saved as separate blocks.
View Detail

Batch Save ChatGPT to Notion This is a guide on how to save multiple ChatGPT responses to Notion in a batch. Tools You'll Need: * ChatGPT: An AI chatbot that can generate text. * Notion: A note-taking and project management tool. * Python: A programming language. * Requests Library: A Python library for making HTTP requests. Steps: 1. Get Your Notion API Token: - Go to your Notion workspace settings. - Navigate to the "Integrations" tab. - Click "Create new integration" and choose "API Token". - Copy your API token. 2. Install Python Libraries: - Open your terminal or command prompt. - Type `pip install requests` and press Enter. 3. Write Python Script: - Create a new Python file (e.g., `save_chatgpt_to_notion.py`). - Paste the following code into the file, replacing `YOUR_NOTION_API_TOKEN` with your actual token: ```python import requests def save_chatgpt_response_to_notion(response, page_id, token): """Saves a ChatGPT response to a Notion page.""" url = f"https://api.notion.com/v1/pages/{page_id}/children" headers = {"Authorization": f"Bearer {token}"} data = { "parent": { "page_id": page_id }, "properties": { "title": { "title": [ { "text": { "content": "ChatGPT Response" } } ] }, "content": { "rich_text": [ { "text": { "content": response } } ] } } } response = requests.post(url, headers=headers, json=data) print(response.status_code) Example usage page_id = "YOUR_NOTION_PAGE_ID" token = "YOUR_NOTION_API_TOKEN" Get ChatGPT responses (replace with your actual ChatGPT interaction) chatgpt_responses = [ "This is the first ChatGPT response.", "This is the second ChatGPT response.", "This is the third ChatGPT response." ] Save each response to Notion for response in chatgpt_responses: save_chatgpt_response_to_notion(response, page_id, token) ``` 4. Run the Script: - In your terminal, navigate to the directory where you saved the Python file. - Type `python save_chatgpt_to_notion.py` and press Enter. 5. Check Notion: - Open your Notion workspace and go to the page specified by `page_id`. - You should see your ChatGPT responses saved as separate blocks.

Batch Save ChatGPT to Notion This is a guide on how to save multiple ChatGPT responses to Notion in a batch. Tools You'll Need: * ChatGPT: An AI chatbot that can generate text. * Notion: A note-taking and project management tool. * Python: A programming language. * Requests Library: A Python library for making HTTP requests. Steps: 1. Get Your Notion API Token: - Go to your Notion workspace settings. - Navigate to the "Integrations" tab. - Click "Create new integration" and choose "API Token". - Copy your API token. 2. Install Python Libraries: - Open your terminal or command prompt. - Type `pip install requests` and press Enter. 3. Write Python Script: - Create a new Python file (e.g., `save_chatgpt_to_notion.py`). - Paste the following code into the file, replacing `YOUR_NOTION_API_TOKEN` with your actual token: ```python import requests def save_chatgpt_response_to_notion(response, page_id, token): """Saves a ChatGPT response to a Notion page.""" url = f"https://api.notion.com/v1/pages/{page_id}/children" headers = {"Authorization": f"Bearer {token}"} data = { "parent": { "page_id": page_id }, "properties": { "title": { "title": [ { "text": { "content": "ChatGPT Response" } } ] }, "content": { "rich_text": [ { "text": { "content": response } } ] } } } response = requests.post(url, headers=headers, json=data) print(response.status_code) Example usage page_id = "YOUR_NOTION_PAGE_ID" token = "YOUR_NOTION_API_TOKEN" Get ChatGPT responses (replace with your actual ChatGPT interaction) chatgpt_responses = [ "This is the first ChatGPT response.", "This is the second ChatGPT response.", "This is the third ChatGPT response." ] Save each response to Notion for response in chatgpt_responses: save_chatgpt_response_to_notion(response, page_id, token) ``` 4. Run the Script: - In your terminal, navigate to the directory where you saved the Python file. - Type `python save_chatgpt_to_notion.py` and press Enter. 5. Check Notion: - Open your Notion workspace and go to the page specified by `page_id`. - You should see your ChatGPT responses saved as separate blocks.

Save ChatGPT Conversations to Notion with One Click Export your ChatGPT conversations directly to Notion with a single click.

290.25 M
Effortless Image Splitting Tool for Creative Projects
View Detail

Effortless Image Splitting Tool for Creative Projects

Effortless Image Splitting Tool for Creative Projects

Easily split large images online into smaller parts for social media, web design, and creative projects with our intuitive Image Splitter tool.

7.29 K
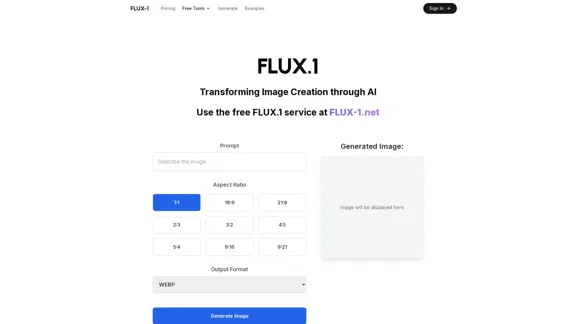
Flux-1
View Detail

Flux-1

Flux-1

FLUX.1 is a new open-source image generation model developed by Black Forest Labs

39.33 K
Komiko | Create Comics and Webtoons with AI
View Detail

Komiko | Create Comics and Webtoons with AI

Komiko | Create Comics and Webtoons with AI

Bring your stories to life with AI. Create captivating comics, webtoon, and visual stories. Design original characters and dive into limitless story worlds.

44.26 K
You
View Detail

You

You

mogU - This is a very good AI assistant.

290.25 M
TubeX: Your YouTube AI Copilot (Free Tool)
View Detail

TubeX: Your YouTube AI Copilot (Free Tool)

TubeX: Your YouTube AI Copilot (Free Tool)

Integrate the power of Gemini AI and Google Translate into your YouTube, making it a great tool for learning foreign languages

290.25 M